TAVI Planning Plugin User Manual
This user manual explains how to use the TAVI Report Plugin for OsiriX MD.
- Open the CTA study in the 2D Viewer
- Launch the plugin, located in the Plugins menu, in the Report submenu.
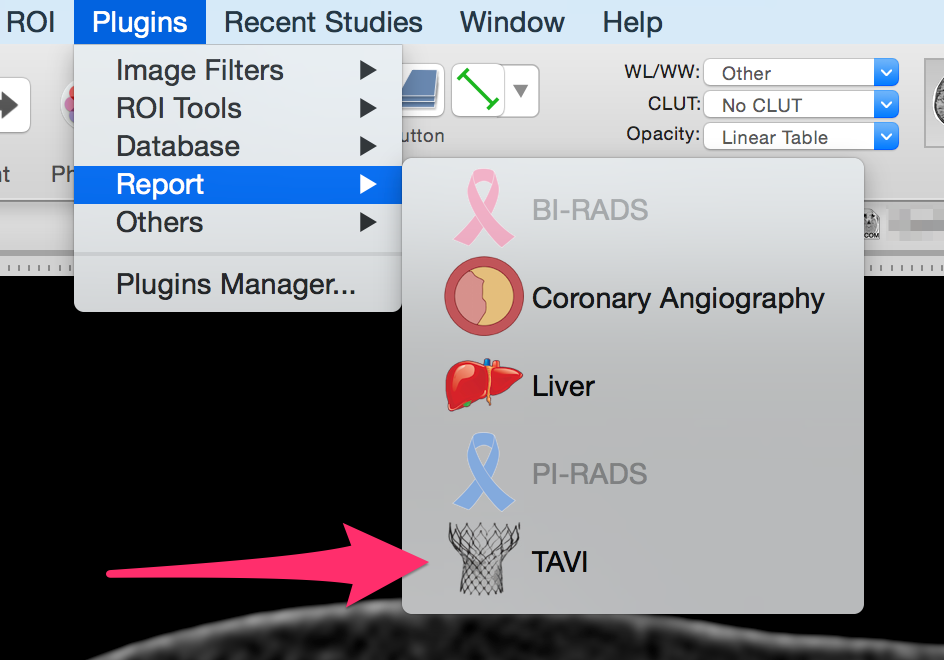
- This plugin is a step-by-step procedure: for each step, you will produce the corresponding image(s).
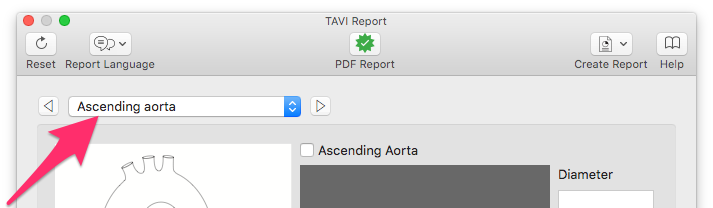
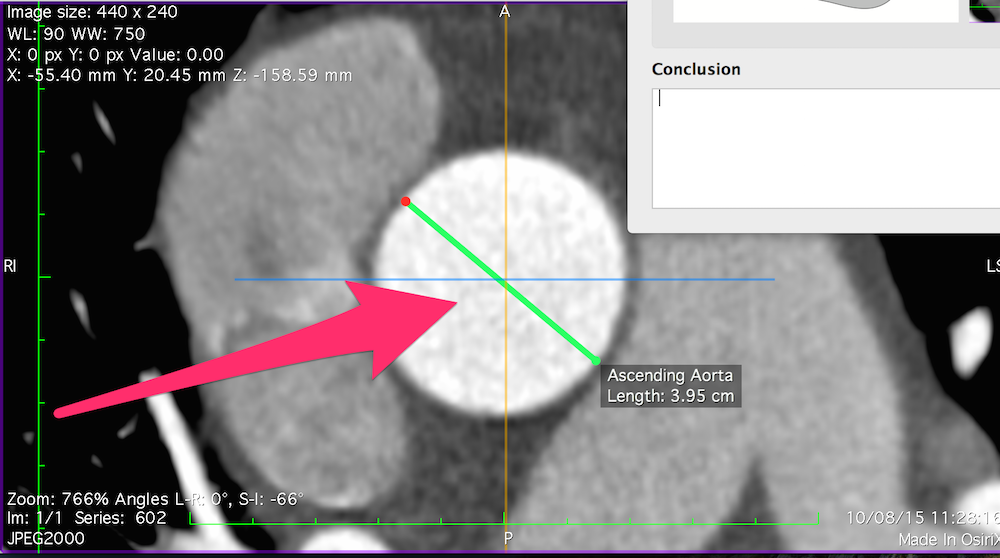
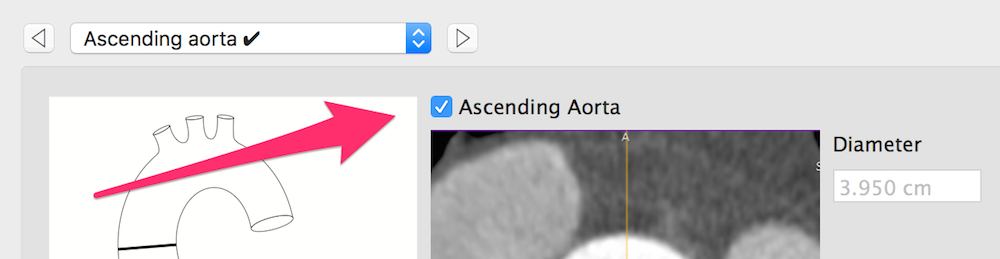
- Ascending Aorta Diameter: The first step is the ascending aorta diameter. Open the 3D MPR viewer, and locate the perpendicular plane of the ascending aorta. Use the Length ROI to measure the diameter, and press the "Ascending Aorta" check box. You can adjust the screen capture, by clicking in the small view (left-click to pan, right-click to zoom).
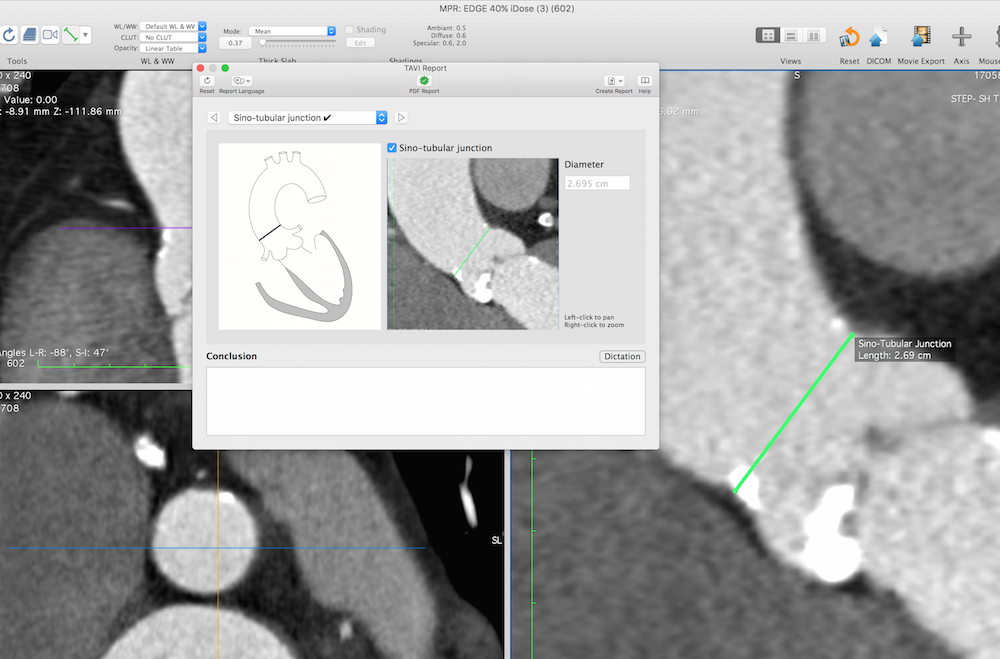
- Sino-Tubular Junction: Repeat the previous step for the sino-tubular jonction diameter. If needed, you can easily hide or show the 3D MPR planes, by pressing the keyboard space bar key.
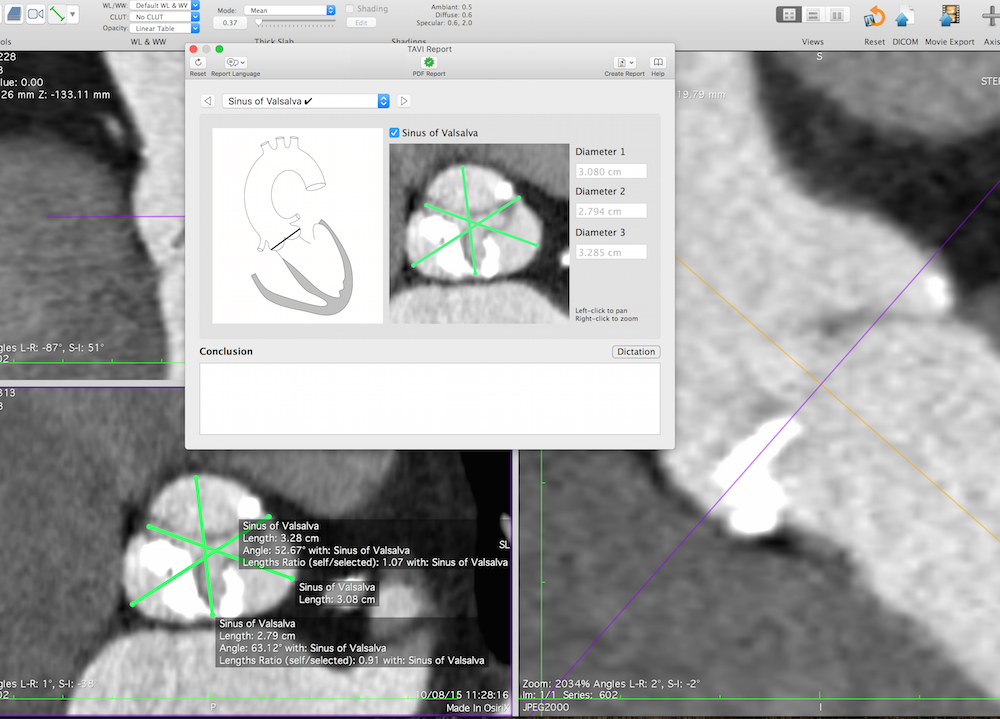
- Sinus of Valsalva: Move the plane to the sinus of Valsalva level, and draw the 3 diameters with the Length ROI.
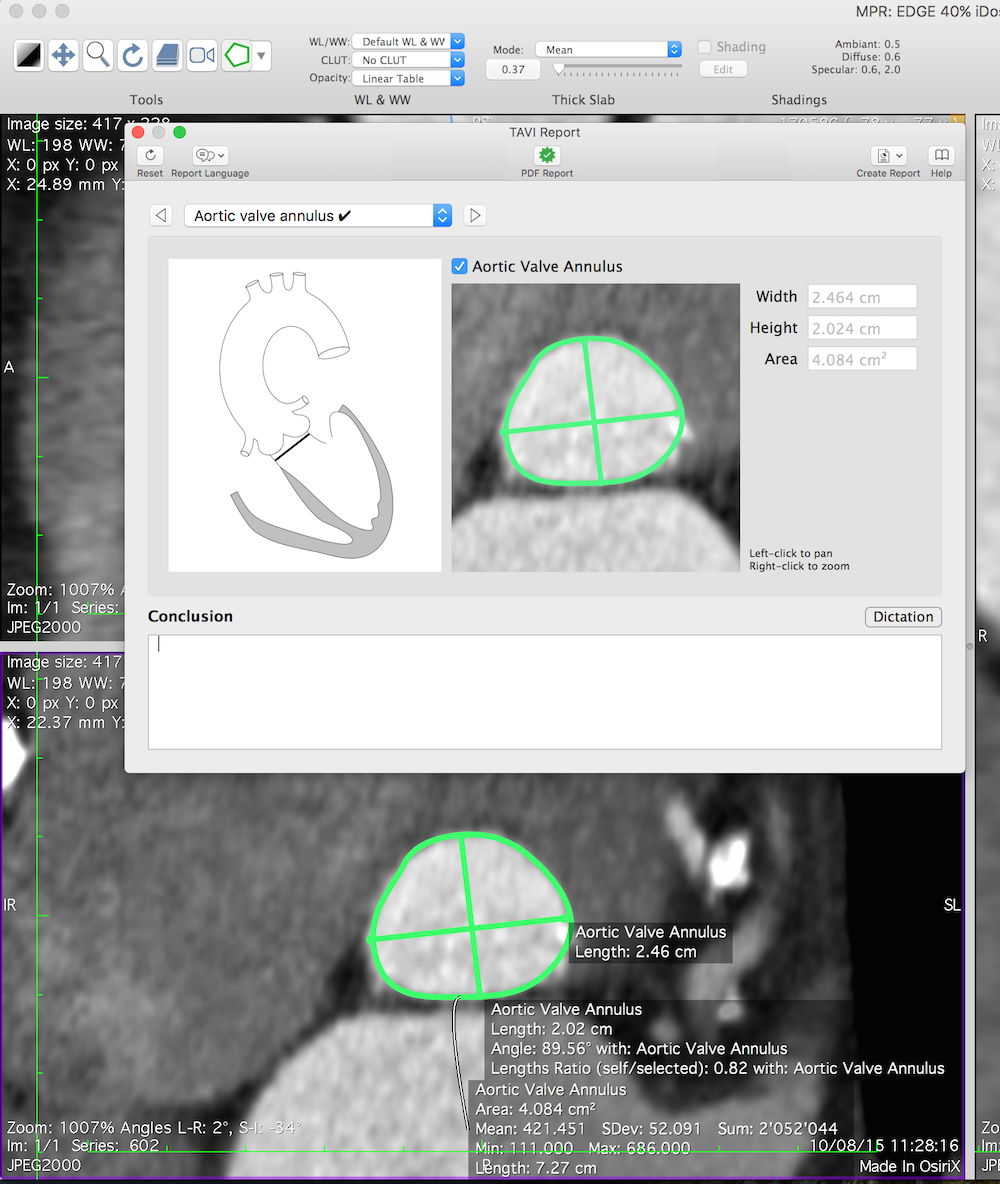
- Aortic Valve Annulus: Repeat the previous step for the aortic valve annulus. Draw the 2 diameters, and the contour, with the Closed Polygon ROI.
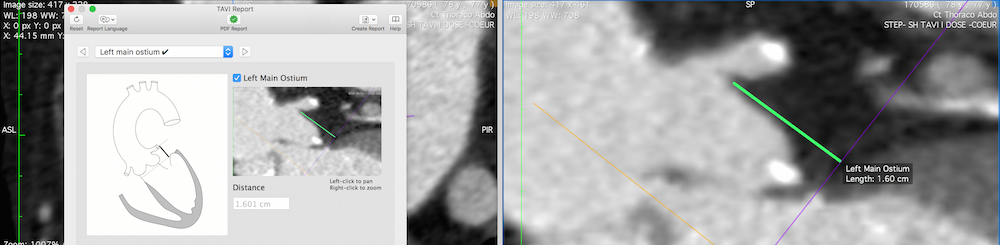
- Left Coronary Ostium: Rotate the plane by using the cross reference lines from the aortic valve annulus plane, to display the left coronary. Draw a perpendicular Length ROI from the plane to the lower part of the coronary ostium.
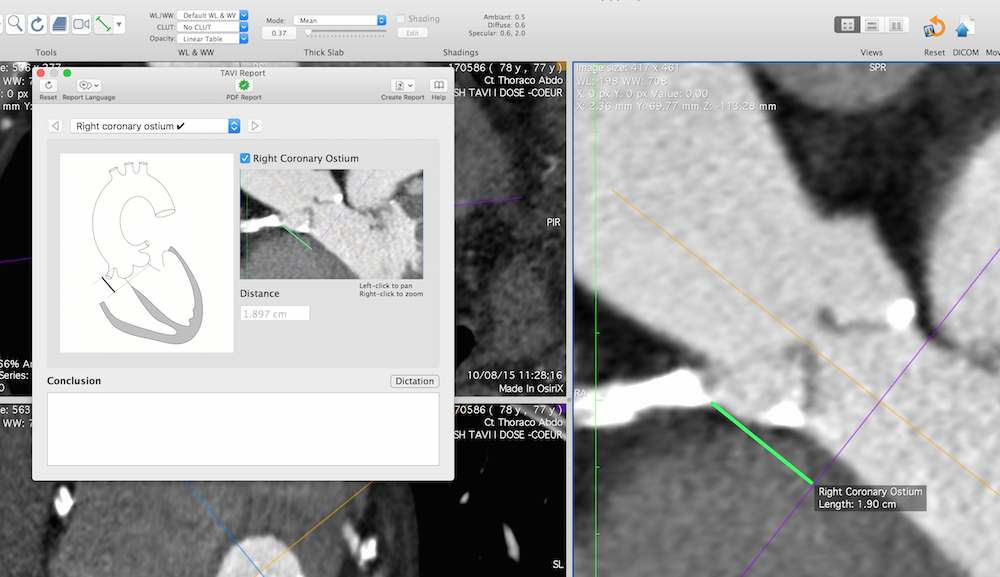
- Right Coronary Ostium: Repeat the previous step for the right coronary.
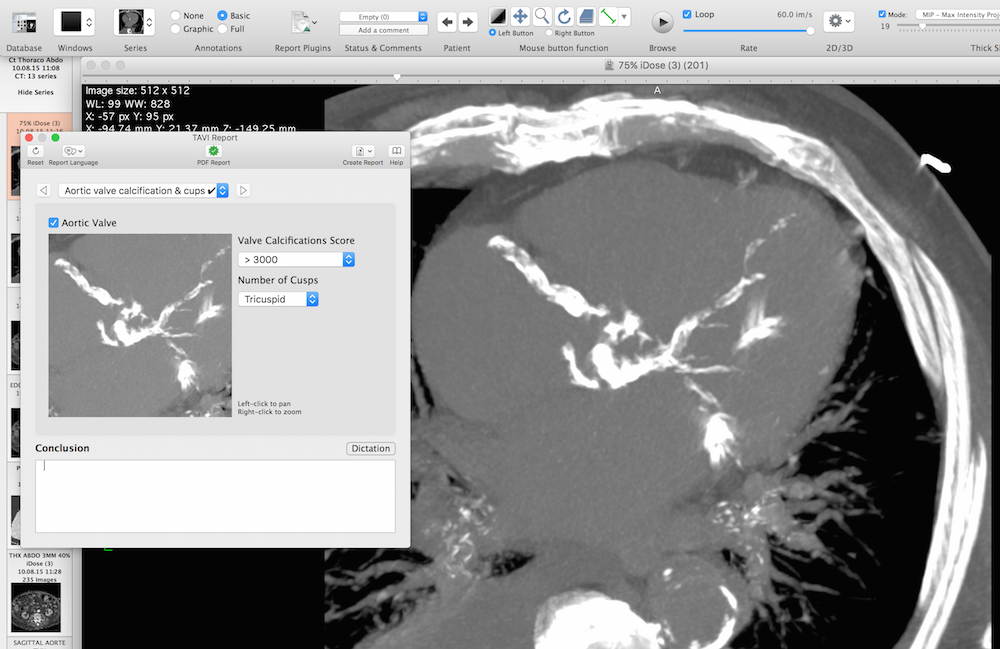
- Aortic Valve Calcifications: Close the 3D MPR viewer, and open the Calcium Score acquisition for the calcification score. Click on the checkbox to take a screen capture.
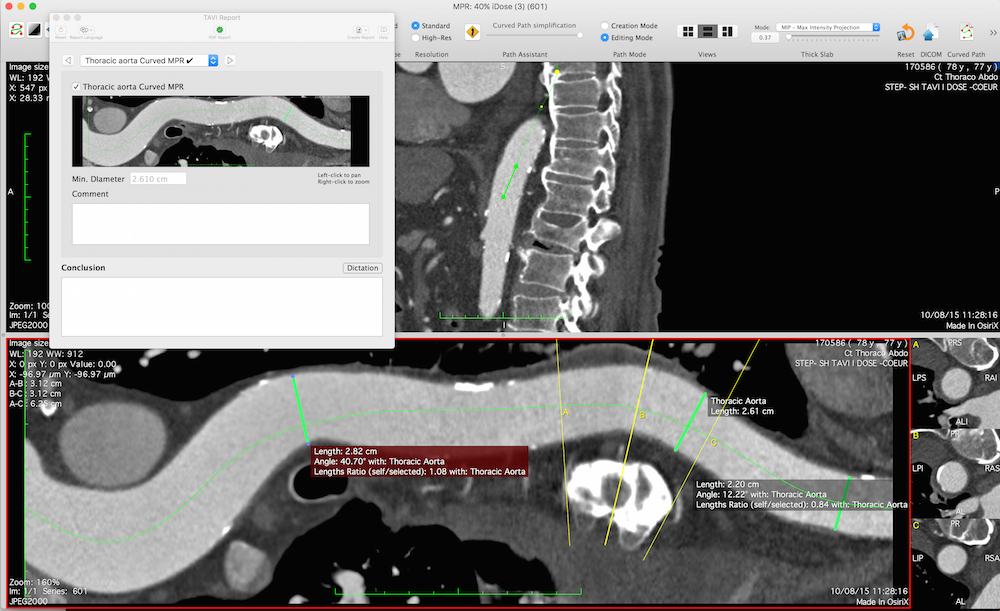
- Thoracic Aorta: Open the 3D Curved MPR viewer with the CTA thoracic series. Delimiter the center path of the thoracic aorta: you can easily hide or show the 3D MPR planes, by pressing the keyboard space bar key. Draw the minimum diameter on the Curved MPR View. You can draw several diameters, the minimum diameter will be reported.
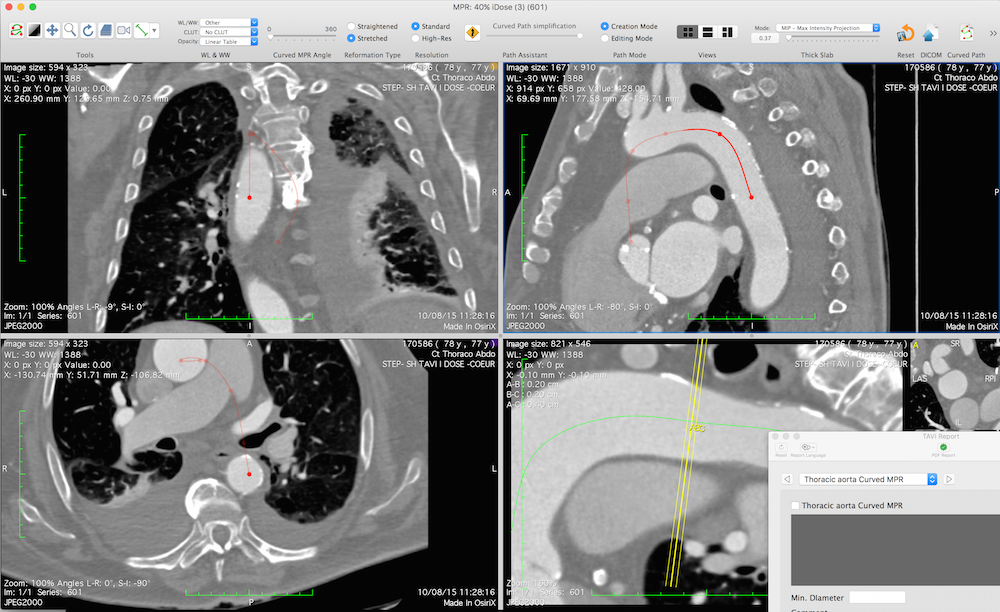
- Abdominal Aorta: Repeat the previous step for the abdominal aorta.

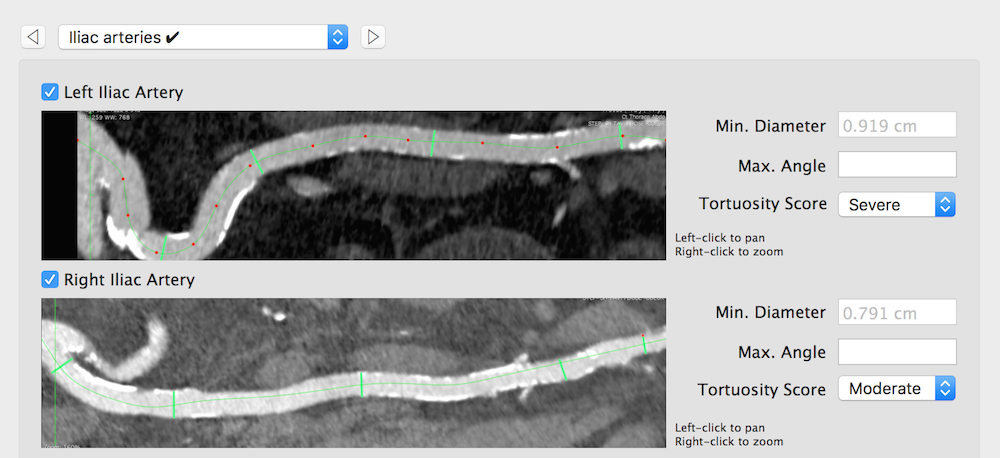
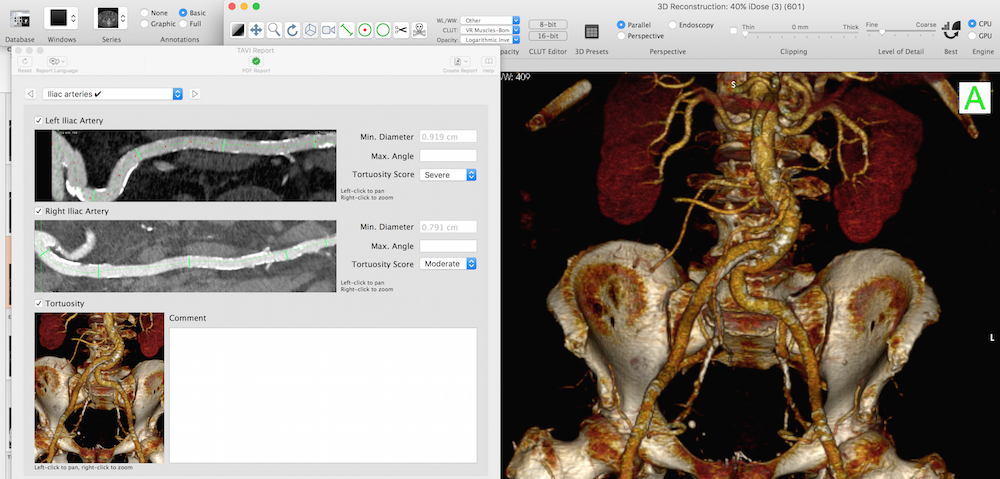
- Iliac Arteries: Repeat the previous step for each iliac vessel. Delimiter the path from the aorta to the peripheral femoral artery.
Use the 3D VR Viewer to produce a 3D image to estimate the iliac arteries tortuosity.
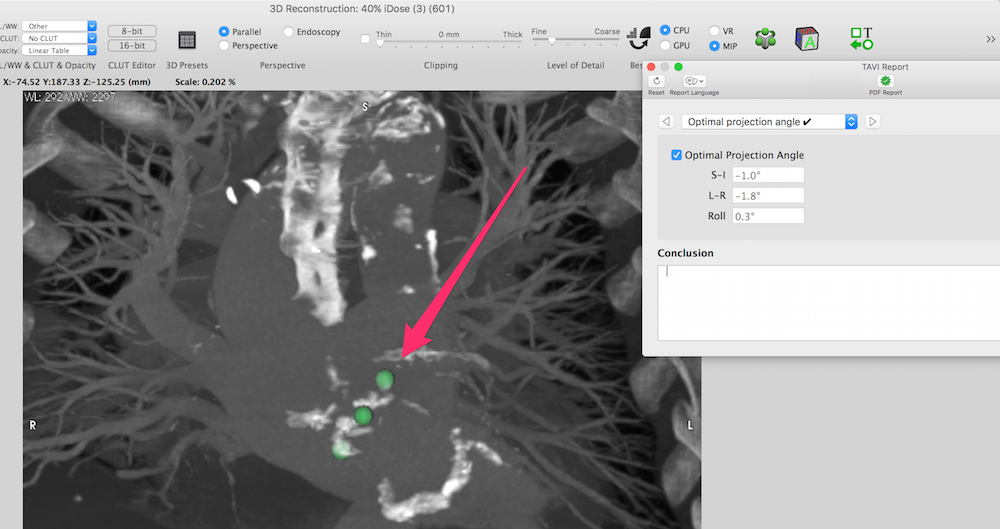
- Optimal Projection Angle: use the 2D MPR viewer, to place a 3D Point ROI on each Valsalva sinuses.
Close the 2D MPR viewer and open the 3D MIP viewer to align the 3D point on a line, with the same distance between each points. This orientation will give you the best projection angles.
- You can then produce the report, by pressing the PDF Report button, in the toolbar.

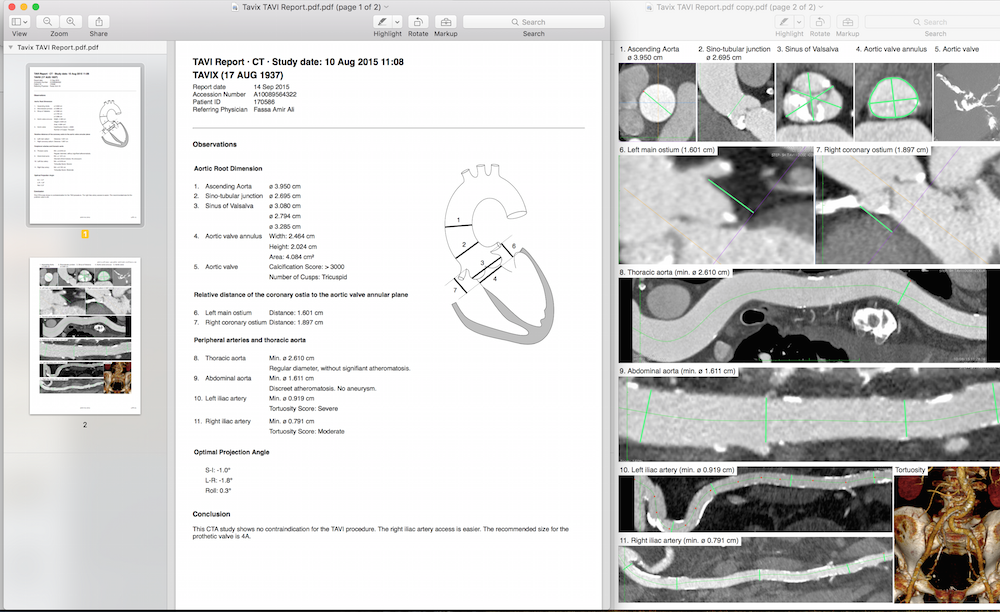
The resulting PDF report will look like this: