OsiriX HD User Manual
Table of Content
- Copyright
- Database
- Viewer
- DICOM Network Images Transfers
- Images Transfers from/to OsiriX for Mac
- iTunes File Sharing
- Download images from a Web site / emails
- Dropbox
- Google Drive
- Files, iCloud Drive
- osirix:// URL scheme
- Settings
- JPEG2000
- Security
- Bug Report
- More
Copyright
OsiriX HD is an application written for iOS devices.
Copyright 2011- Pixmeo SARL
Database
The Database button displays the list of studies stored locally on your iOS device.
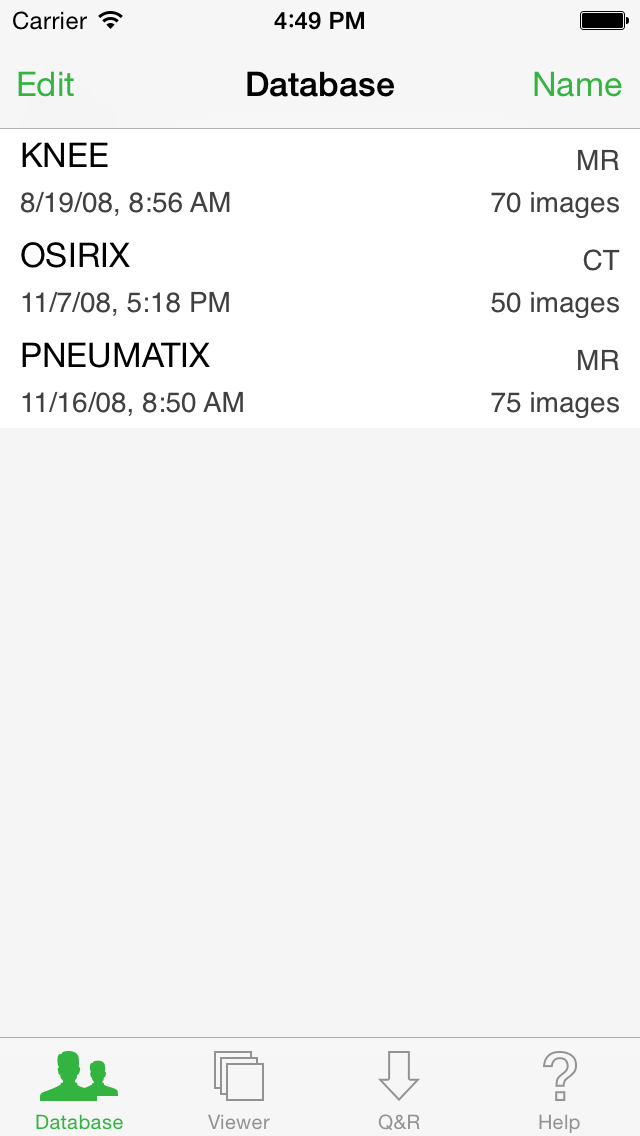
Tap on any of them to display the list of Series it contains.
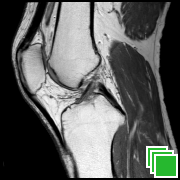
In the Series list, tap a thumbnail to load the Series in the Viewer. The loaded Series will appear in the database with a little green viewer icon, making it easier to locate.
Adding Images
To add images please refer to the Images Transfers section.
Create secondary capture
You can use the device camera to add secondary captures to a study. To do so, open the study and tap the "+" button at the bottom of the series list.
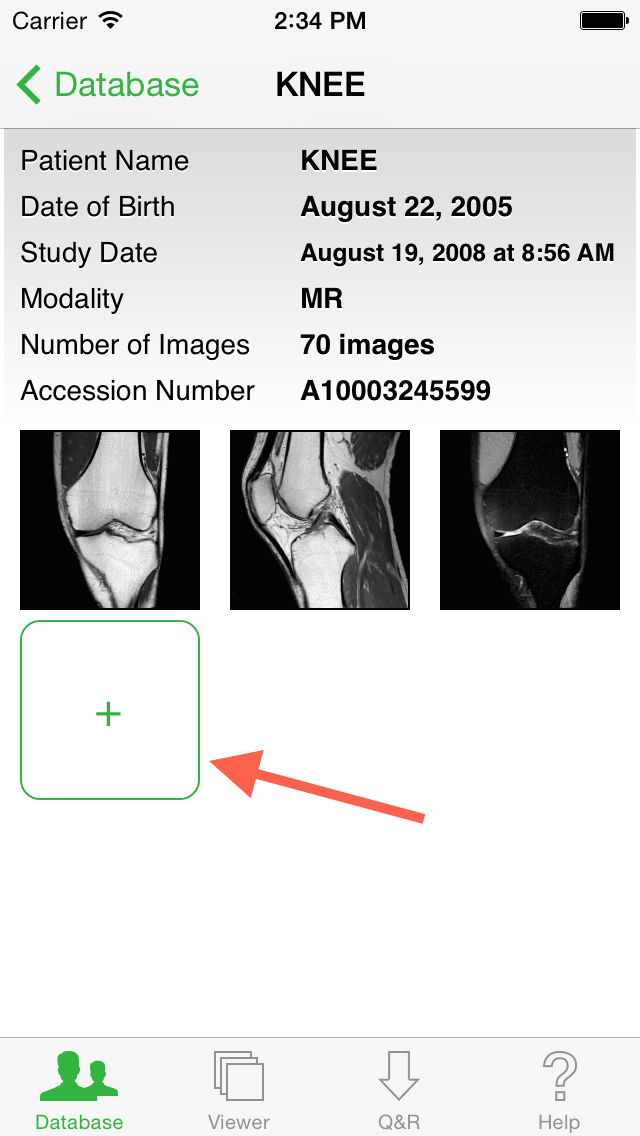
You will then be able to choose a photo from your photo library or to take a picture with the camera. A new series will be created with the selected image.
Deleting Series
Series can be manually deleted from a Study.
To do so, tap and hold the thumbnail of the series to be removed. An alert will ask you to confirm the deletions of the selected series.
Limitations
OsiriX HD cannot display images greater than 1800 x 1800 pixels.
To display images with one dimension greater than 1800 pixels, OsiriX HD will resize the image to make it smaller or equal to 1800. In that case, OsiriX HD will display the following warning message:
Viewer
Here is a quick description of the Viewer features:
- The toolbar, located on the top, contains:
 Display a list of all series available in the current study. You can drag the series in the viewers (this is useful if two viewers are displayed). Only available on iPad.
 Display or hide the second viewer. Only available on iPad.
 Window level/width presets for CT (Abdomen, Bones, Brain, Lungs and Full Dynamic).
-


 Orientation: Axial, Sagittal, Coronal. See MPR.
 The tools: image manipulation, length measurement and area measurement.
 Meta-Data: All the DICOM fields of the current image are displayed in a table.
 Send the entire DICOM series to a DICOM node. See here
- The image view area contains several labels: Patient Name, Series Description, Window Level & Width, Zoom factor, Angle of rotation.
Note: tap on any label to lock the setting to the current value (lock the rotation to 0° for example). Locked label are gray, unlocked ones are white. - A slider at the bottom of the image to scroll through the image stack.
- Two arrow buttons at the extremities of the slider to go to next/previous image. If you keep you finger pressed on these buttons it will continuously scroll through the stack (cine mode).
By quickly pressing two times on the right arrow button, the images will scroll automatically. Press once again to stop the automatic mode, to return to the manual mode.
Image Manipulation
The image manipulation tool allows you to change the window level and width, zoom in and out, rotate and pan the image. This tool is selected by default.
With one finger, you can:
- Change the window level, by moving vertically.
- Change the window width, by moving horizontally.
- Pan the image (Only if the wl/ww label is locked)
- Double tap to toggle the zoom level between 100% and fit-to-screen.
- Swipe left/right to go to previous/next Series.
With two fingers, you can:
- Pinch to zoom in and out.
- Rotate the image (if the angle label is unlocked - which is the default).
- Pan the image.
Series selection
Only available on iPadBy pressing on this icon, a list of all series and studies available for the current patient is displayed. You can either press on a thumbnail or drag and drop the thumbnail on the view where you want to display the series.
If two views are displayed (see 2nd viewer), you have to drag and drop the thumbnail to change the content of the second viewer.
2nd viewer
Only available on iPadYou can either display a unique viewer or two viewers on the screen. By displaying a second viewer, you can compare a different study of the same patient, or you can view two series of the same study.
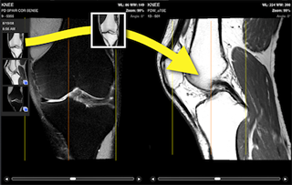
If the series are from the same study, and if the 3D references are available in the DICOM files, the cross reference lines are displayed:
- The first and the last slice of the series is displayed with a yellow line.
- The current slice is displayed with an orange line.
To change the content of the viewers, use the series selection button (see Series selection).
You have to drag and drop the thumbnail to change the content of the second viewer by using the series selection button.
Multiplanar Reconstruction (MPR)
Tapping on the orientation button allows you to change the orientation of the series. Keep tapping on the button to cycle through the 3 orientations: Axial, Sagittal and Coronal.
| Axial | |
| Sagittal | |
| Coronal |
PET-CT blending
Only available on iPad
You can fuse pre-registred PET-CT series. To do so, open the CT series and the PET using the 2nd viewer.
Measurements
Two different tools are available: length and area.
- The length measurement tool:
Define a line between your 2 fingers. Once the line has been created you can refine it by simply moving its extremities, or move it (if you grab it by its center).
- The area measurement tool:
Define a circle between your 2 fingers. Once the circle has been created you can move it with one finger.
For both tools:
- When you tap on a measurement, a colored area appears around it. This is the area where you can place your finger to manipulate it.
- You can double tap anywhere (but not on the measurement) with one finger to erase it (and then start over).

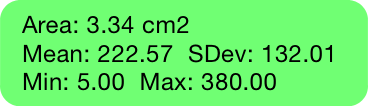
When you use these tools, an information bubble appears. This bubble displays the data of your measurement (such as length, area, mean, standard deviation, min and max values).
To change the color of the measurements, see the Settings section.
DICOM Network Images Transfers
OsiriX HD being a DICOM compliant device, all transfers are done through the DICOM protocol.
The following protocols are supported:
- Standard DICOM (including C-STORE SCP, C-GET SCU, C-MOVE SCU and C-FIND SCU)
- DICOMweb (including WADO, WADO-RS, STOW-RS and QIDO-RS)
If your DICOM network supports DICOMweb protocol, it's recommended to use it. Connecting to a DICOMweb server is easier and secure.
First, you will need to connect to your DICOM network through WiFi or 3G/4G/5G, including through a VPN
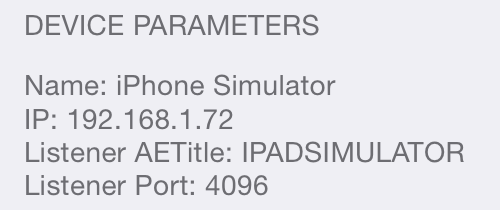
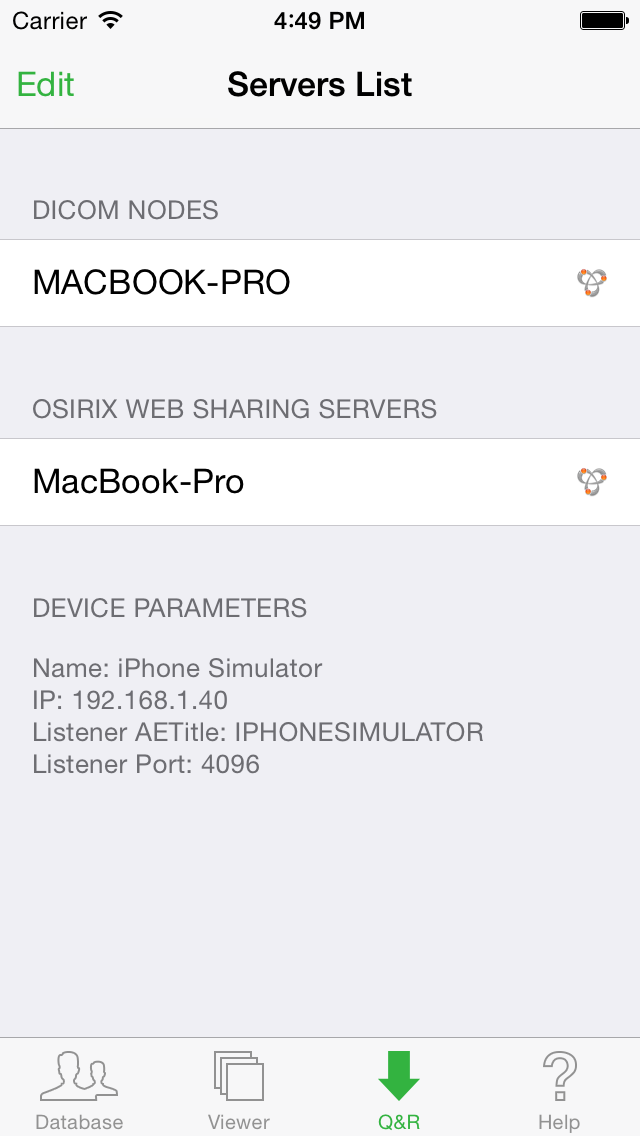
Once your iOS device is connected to the network, you will need to declare it as a DICOM node on the DICOM network, if you use the Standard DICOM protocol. This step is not necessary, if you use the DICOMweb protocol. If you have a Mac running OsiriX 11 (or higher), you can directly go to Connecting to the Mac section of this document. Otherwise, you will need to get the following information and ask your network manager to add your iOS device to the DICOM network:
- IP address
- Listener AETitle
- Listener Port
This information is available in the "Q&R" tab of OsiriX HD:
Once the device is declared as a DICOM node, it can receive images from other DICOM workstations on the network. Of course, OsiriX HD needs to be launched on your device in order to listen to incoming DICOM communications.
DICOM Query and Retrieve
DICOM Q&R configuration
OsiriX HD supports the standard DICOM Query and Retrieve protocol. This feature allows you to search for and retrieve images from a PACS server or a DICOM-compliant Workstation from your device and directly download them to OsiriX HD database on your iOS device.
To enable this feature, you will need to specify a new "DICOM Server" (such as a PACS Server) in your DICOM Q&R list.
First you will need to ask you PACS or IT manager the following information about the DICOM Server you want to connect to.
If it is a Standard DICOM server:
- The server's IP address,
- the port number it uses for DICOM communications
- and its AETitle.
If it is a DICOMweb server:
- The server full http address, such as https://dicomweb.pacs.com:8080/wado
- Your username and password, if authentication is activated
To add the new DICOM server to your list, proceed as follows:
- Tap on the Q&R button of the tab bar
- Tap on the "Edit" button (upper left corner)
- Tap on "Add new Node" in the "DICOM Query & Retrieve Servers" section or on the green "plus" button.
- Enter all the parameters of the server as described above. The "description" field can be anything understandable.
- Tap "Save"
- Tap "Done": Your new server is now in the list!
Fixed IP address? (Standard DICOM protocol)
When you download images from a DICOM Query & Retrieve request with the Standard DICOM protocol, you will require a fixed IP address, if you use the C-MOVE SCU protocol.
You will not require a fixed IP address, if you use the C-GET SCU or DICOMweb protocols.
In most situations, your iOS device will have a different IP address when you turn it on, or when you switch to or from a different network protocol (WiFi, 3G/4G/5G, VPN).
Most VPN will provide a different IP address, but in rare cases, VPN can be configured to have always the same IP address (ask your IT manager for more informations).
Hence, it is highly recommended to use the DICOMweb protocol, instead of the C-MOVE SCU protocol, if the distant DICOM Node supports them.
OsiriX for Mac supports all these protocols.
DICOM Q&R usage
You can now select the DICOM server that was added to the list. On the next screen you will be able to set the search criteria (filter) for retrieving the images you want from the remote server or workstation. The fields that can be used for search criteria are:
- the patient's name
- the accession number
- the study description
- the patient's ID
- the referring physician
- the institution name
- the patient's birth date
- the modality
- the acquisition date
You can fill multiple criteria for more selective search.
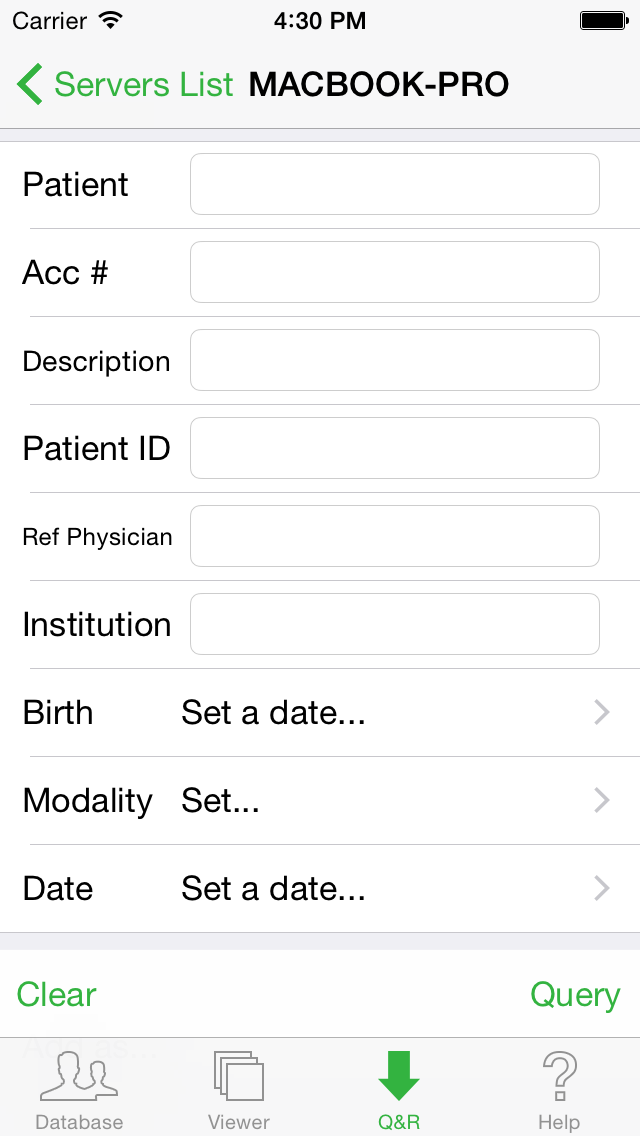
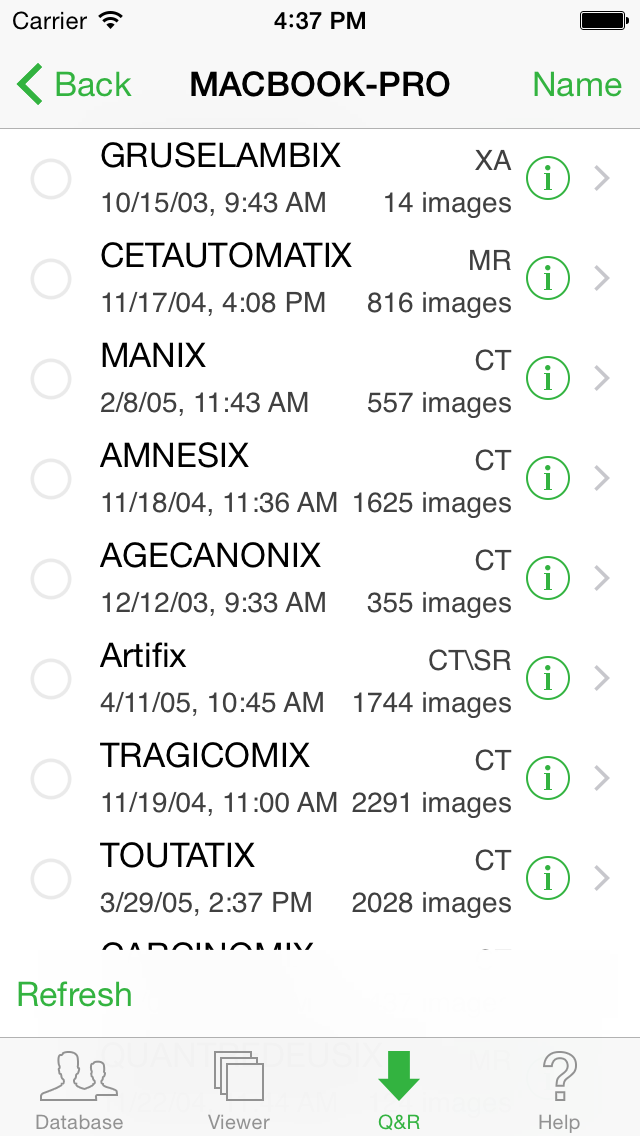
Then tap the "Query" button in the lower right corner. The result of your search will be displayed as a list of studies.
You can also create presets (aka filters): for example, you can have a filter for CT for the modality and Today for the date. Simply add a word in the "Add as..." area, and your preset is created. You can then press on it to apply it. To delete a preset, tap the "Edit" button in the upper right corner.
To retrieve a particular Study, select it in the list and tap the "Retrieve Study" button located in the lower right corner.
To retrieve one or more Series of a Study, select the Study from the list and the select the Series (a green check mark will be display) and tap the "Retrieve Selected Series".
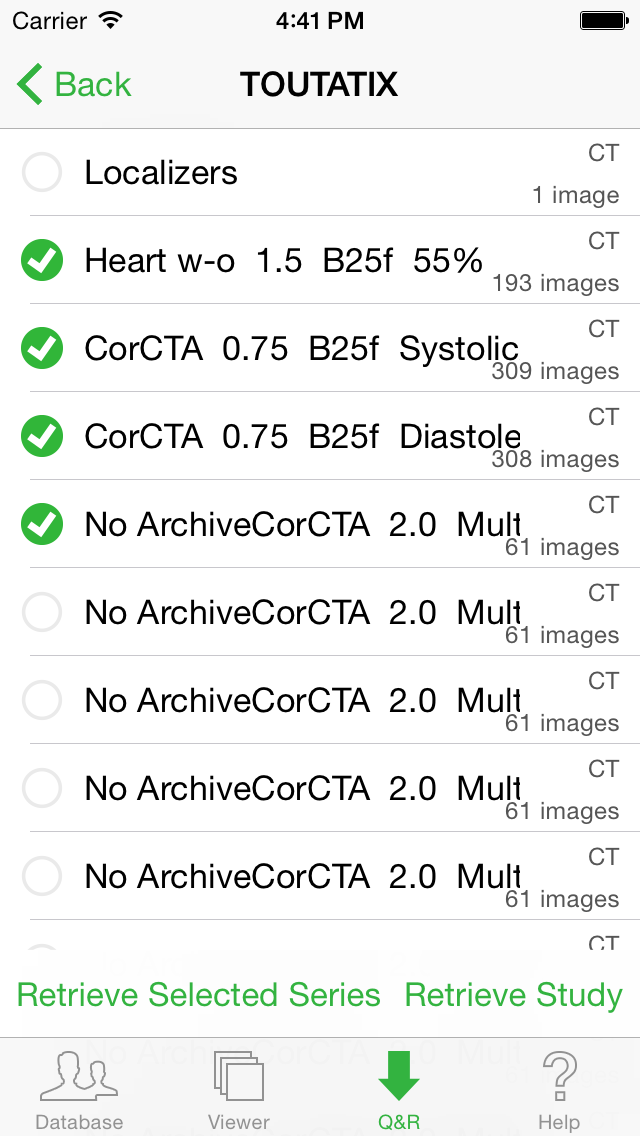
The new images will progressively be transferred and added to your local database (tap the "Database" tab to select them for display).
Send images from OsiriX HD
OsiriX HD supports DICOM C-Store SCU and STOW-RS protocol. That means you can send DICOM images stored on your OsiriX HD database to any DICOM nodes, including another OsiriX HD iOS device, OsiriX for macOS, a DICOM viewer, or a PACS server.
To send an entire DICOM series, simply display it in the Viewer. Then press the Send icon, located on the upper right position in the toolbar.
Select or add a DICOM Node destination.
The images are sent in the background.
Images Transfers from/to OsiriX for Mac
Connecting to the Mac
Sending images from the Mac to the iOS device
To send images from your Mac:
- Make sure that the Mac and the iOS device are on the same WiFi network (same sub-net).
- On the Mac: Turn on "Search for other DICOM Nodes over Bonjour" (in OsiriX > Preferences > Locations).
- On the iOS device: Turn on Bonjour (in Settings > OsiriX HD).
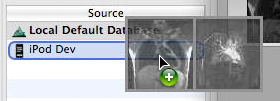
When OsiriX HD is open on your iOS device, it will appear in the "Sources" list of OsiriX on the Mac. To send images, you simply have to drag and drop them on the device in this list.
Requesting images from the Mac on the iOS device
From the "Q&R" tab, you can directly ask your Mac to send you images:
- Make sure that the Mac and the iOS device are on the same WiFi network (same sub-net).
- On the Mac: Turn on "Publish my DICOM node over the network through the Bonjour protocol" (in OsiriX > Preferences > Listener).
- On the iOS device: Turn on Bonjour (in Settings > OsiriX HD).
Then go to the "Q&R" tab of OsiriX HD on the iOS device. Your Mac will appear in the servers list.
If your Mac is not on the same subnet, you can still add it manually using the "Edit" button of the "Q&R" interface.
Once you get your Mac on the list, select it and you will be able to remotely browse the content of its OsiriX database and transfer images that you need.
Limitations
When you send images to your iOS device, you should keep in mind that:
- 3G/4G transfers on the iOS device are not fast. WiFi and 5G are much faster.
- The device resources (CPU, memory and storage) are limited. It is not a workstation.
- Each time you sync your iOS device with your computer, iTunes makes a back up of it. The more images you have on the device, the slower the back up will be.
File Sharing
OsiriX HD supports the File Sharing function of iTunes: you can easily copy files from your computer to your iOS device, through your USB connection.
If you need to copy large amount of files, this function is faster than transferring the images through DICOM protocol on a WiFi network.
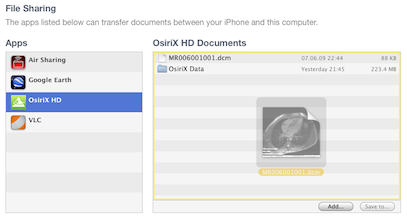
You can copy different types of files with this function:
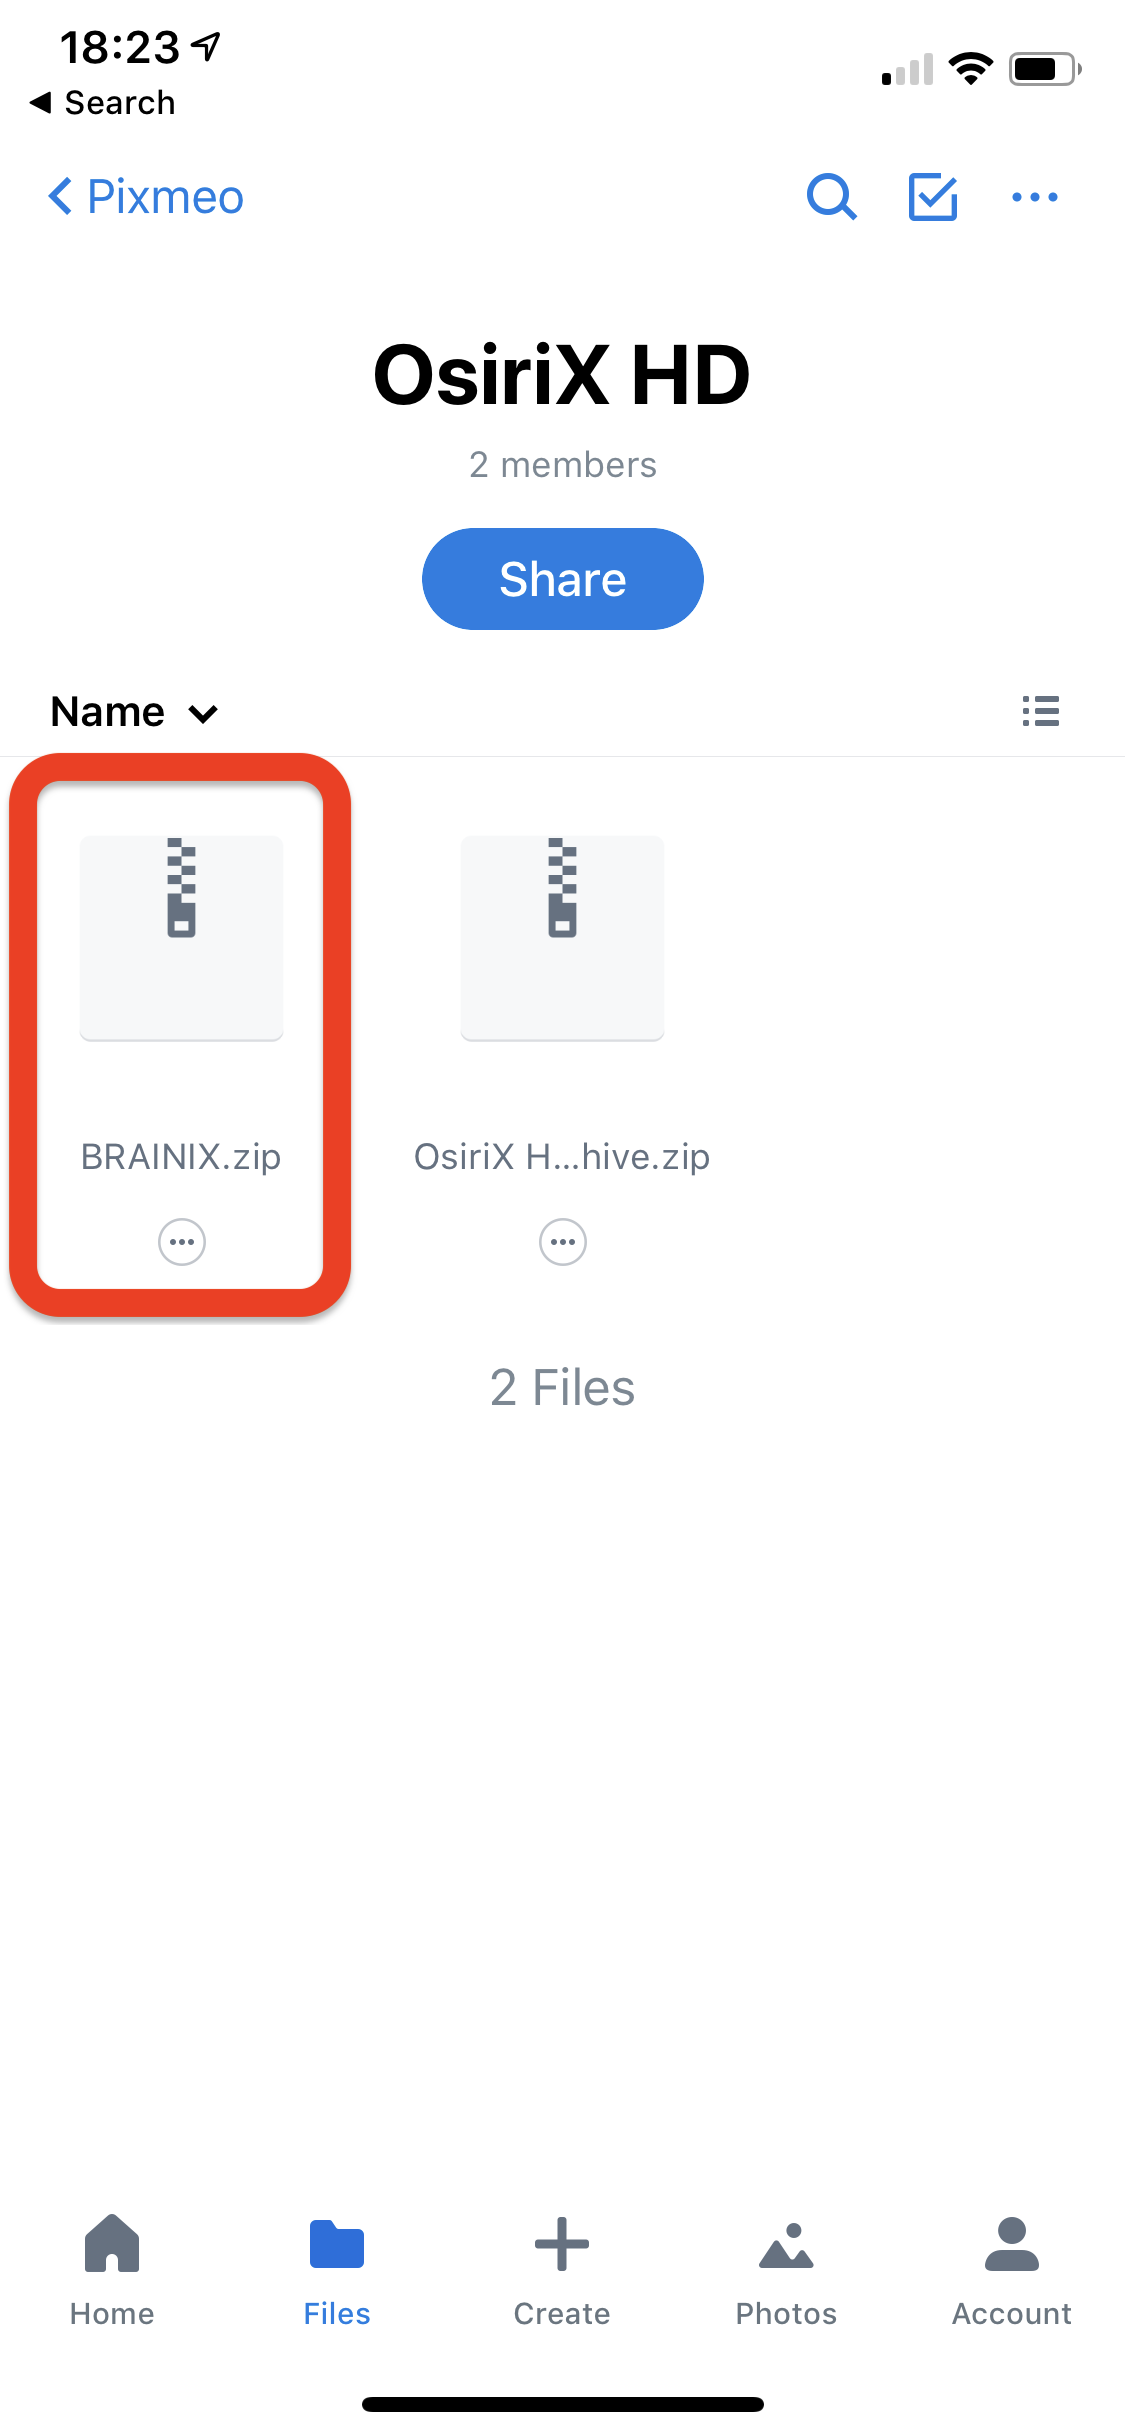
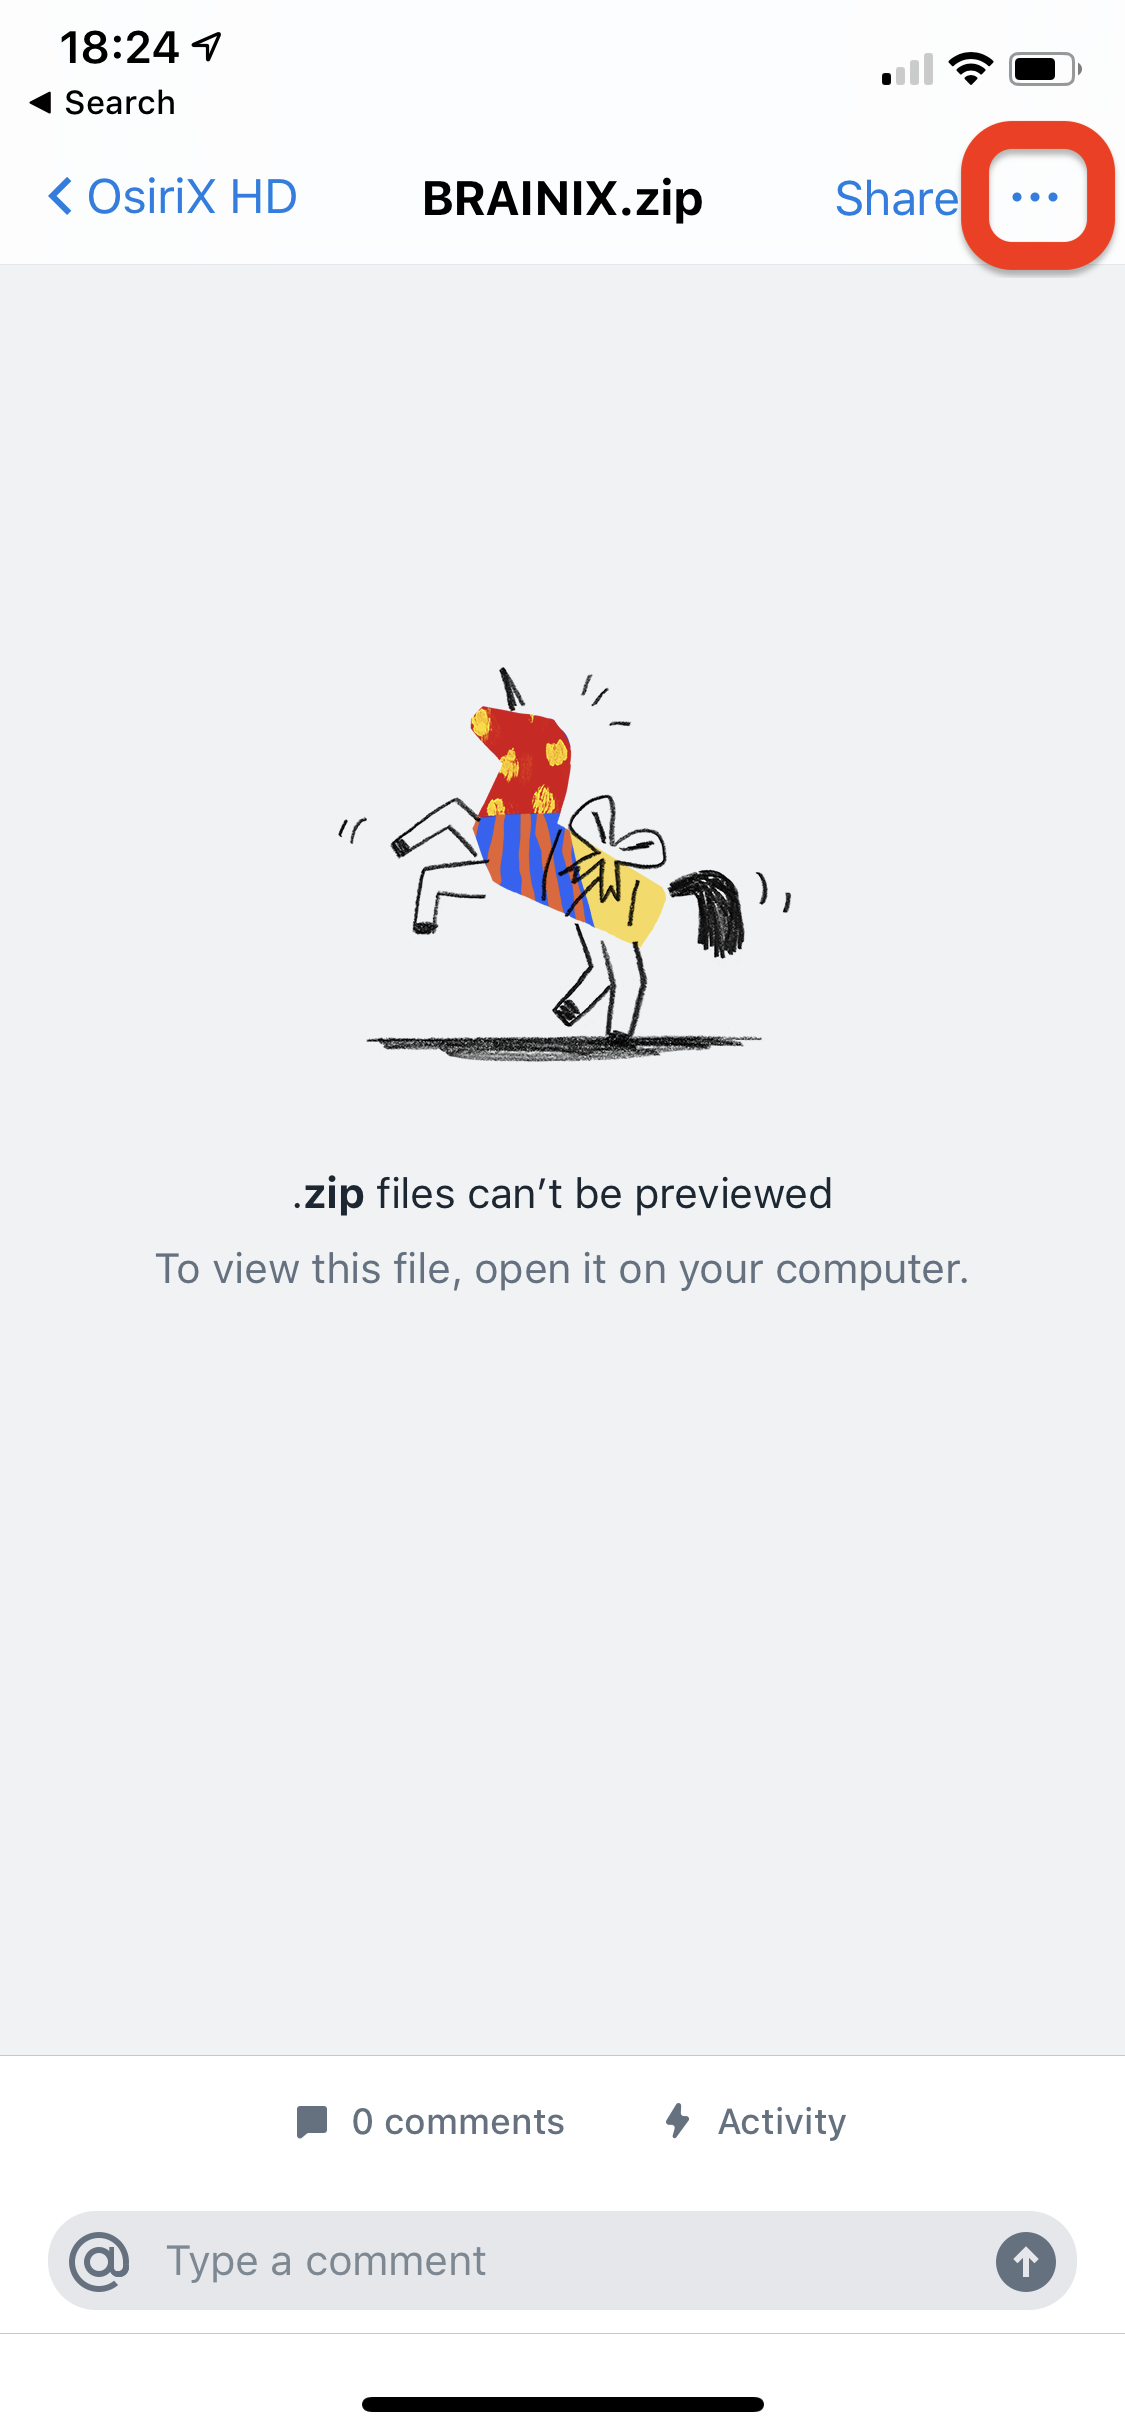
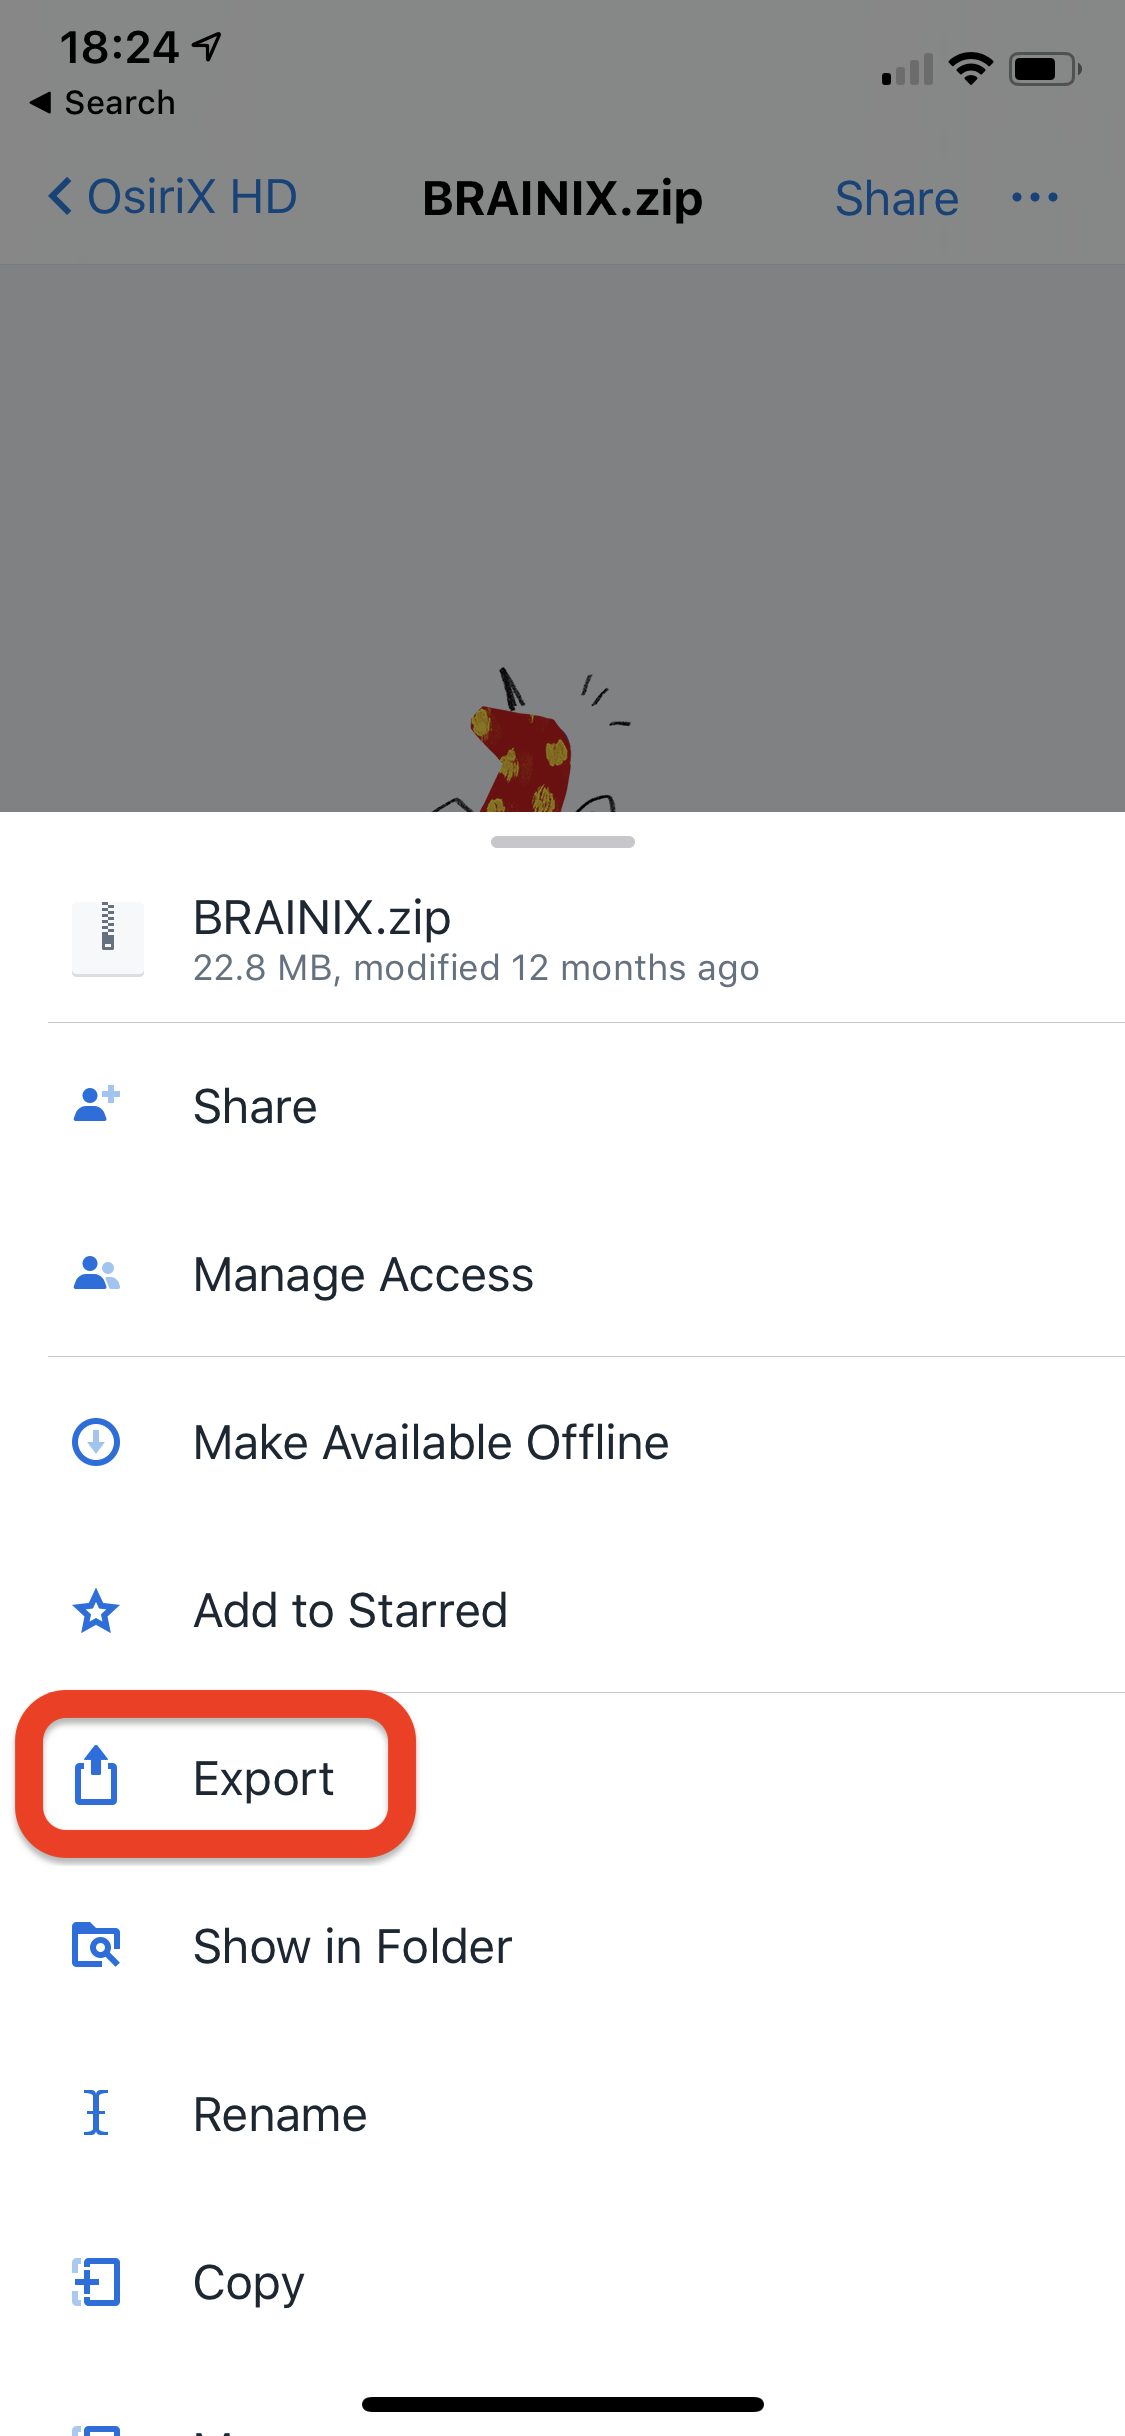
- DICOM files (extension .dcm)
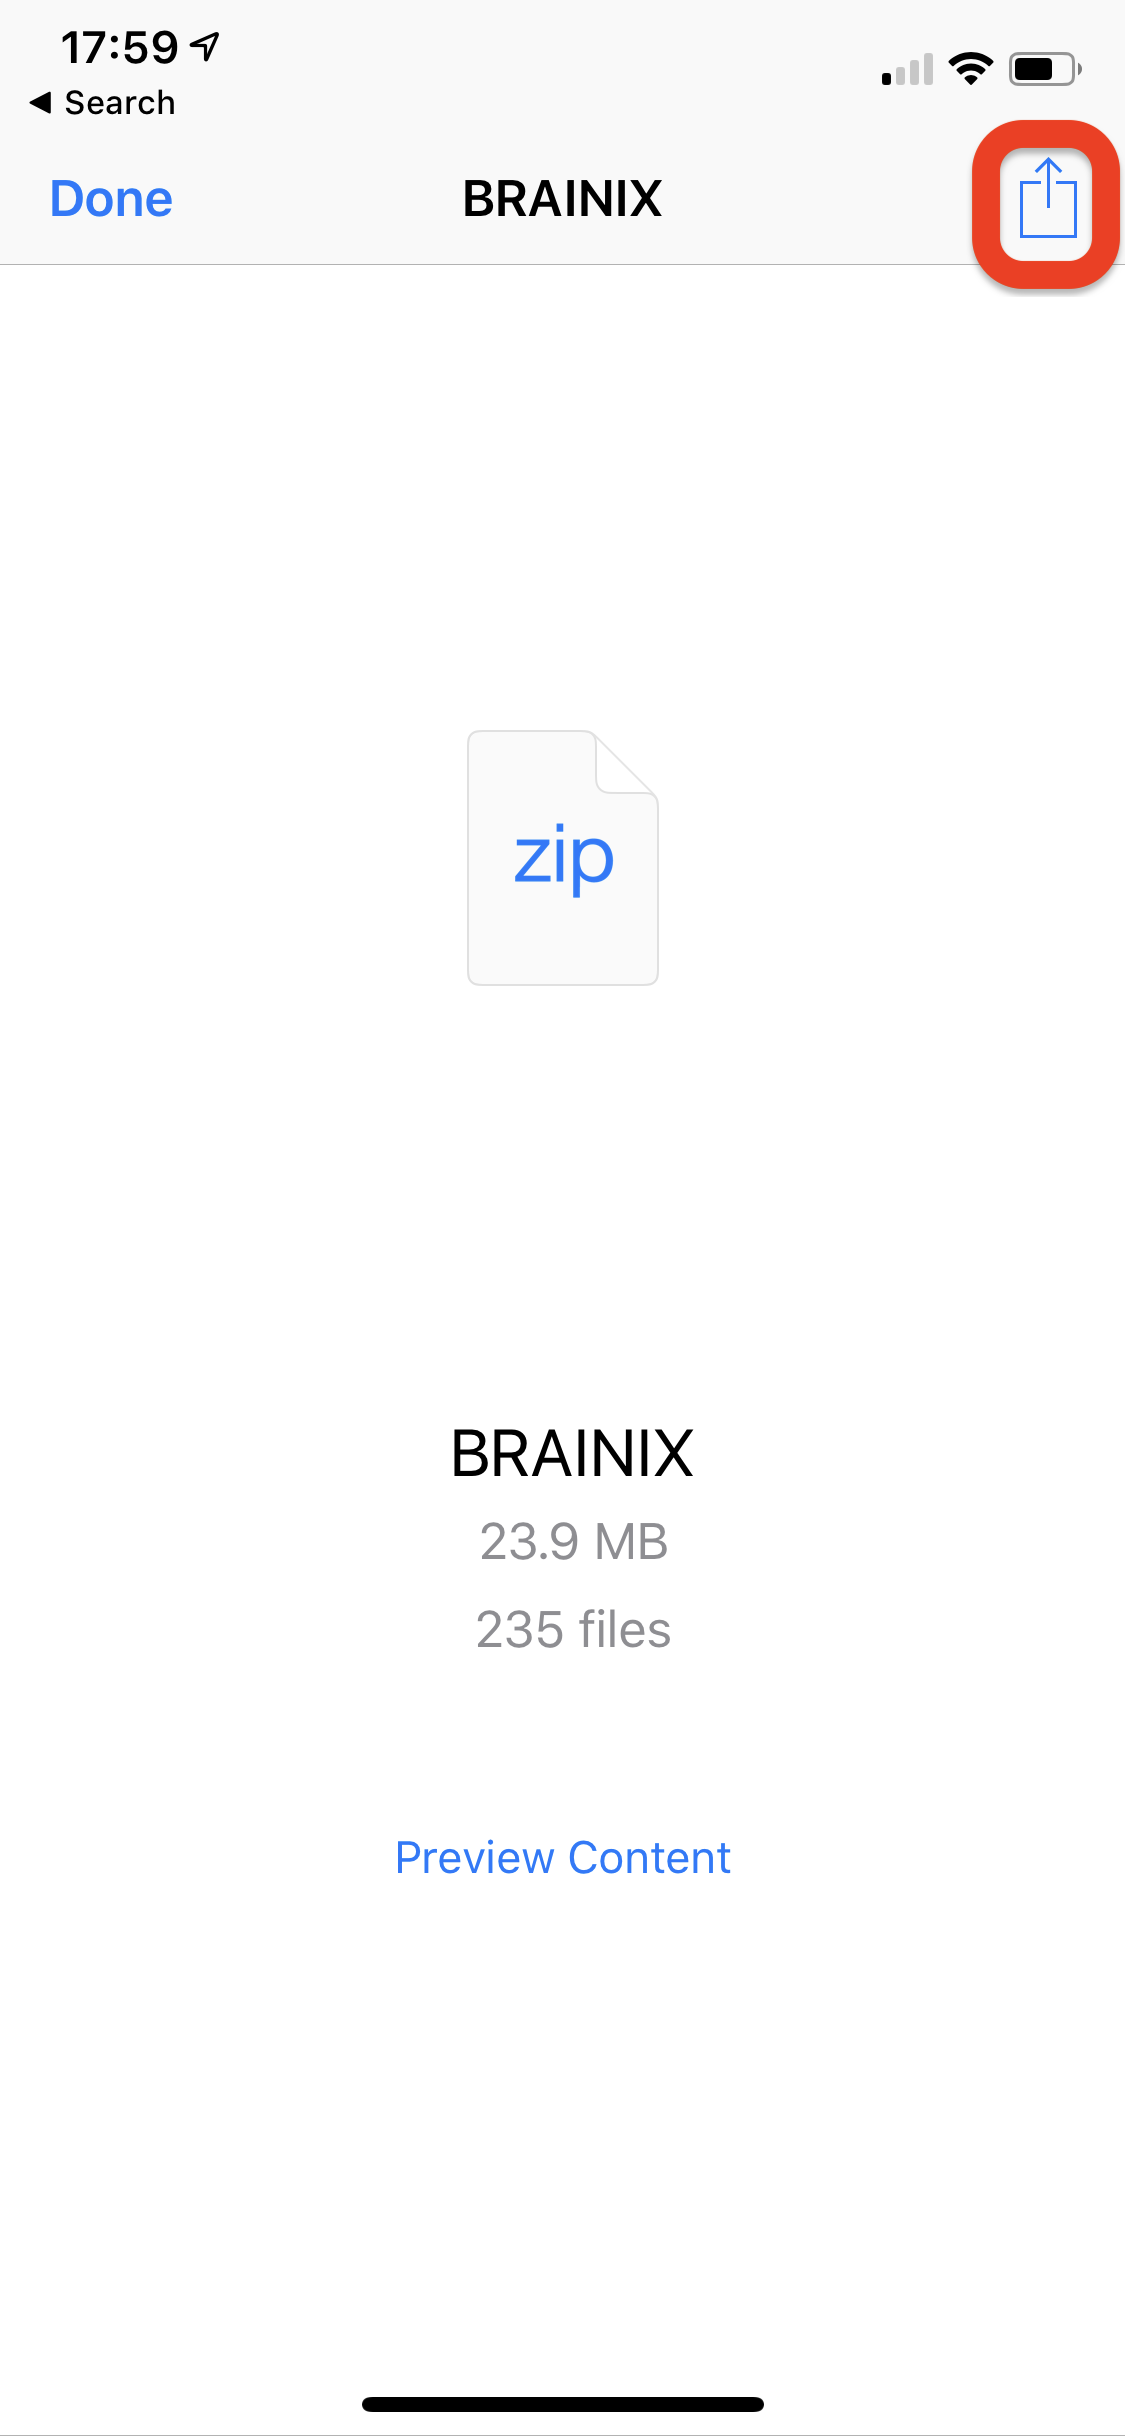
- ZIP files (extension .zip), containing multiple DICOM files. This function allows you to import multiple files at the same time. Indeed, the File Sharing function supports only files, not folders. Password protected ZIP are also supported.
- DICOM Nodes List file (extension .plist), as exported in OsiriX for Mac : Preferences>Locations>Save as. This function allows you to quickly add a complete list of DICOM nodes.
More informations about iOS File Sharing is available here.
Download images from a Web site / emails
You can use OsiriX HD as an application helper for other applications installed on your iOS device.
For example, this function is useful if you receive an email containing a zip file with DICOM files, or if you want to view a DICOM file directly from Safari or Chrome ... Password protected ZIP are also supported.
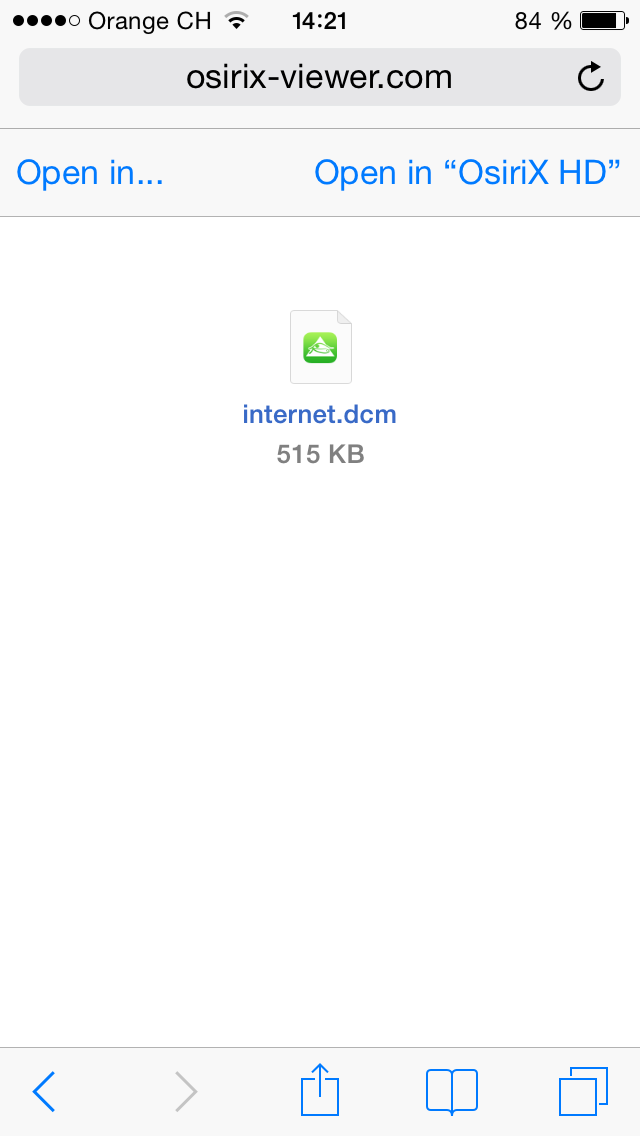
Currently there are four MIME types supported:
- application/dicom (extension .dcm)
- application/osirixzip (extension .osirixzip)
- application/zip (extension .zip)
- application/dcmURLs (extension .dcmURLs)
This is a single DICOM file. OsiriX HD will automatically import the file in the database.
This is a zip file containing DICOM files. It can be password protected. This kind of files is produced by OsiriX for Mac. OsiriX HD will automatically unzip the file, and import the files in the database.
This is a zip file containing DICOM files. It can be password protected. OsiriX HD will automatically unzip the file, and import the files in the database.
This is a text file containing a list of WADO URLs. OsiriX HD will automatically download all these URLs and import the files in the database.
To transfer images through your Dropbox account:
- Copy files (a folder containing DICOM files, compressed in a zip file) or a DICOM file, with the '.dcm' or 'zip' extension in your Dropbox account.
- Launch Dropbox on your iOS device
- Press on the file, and wait until the file is downloaded on your iOS device.
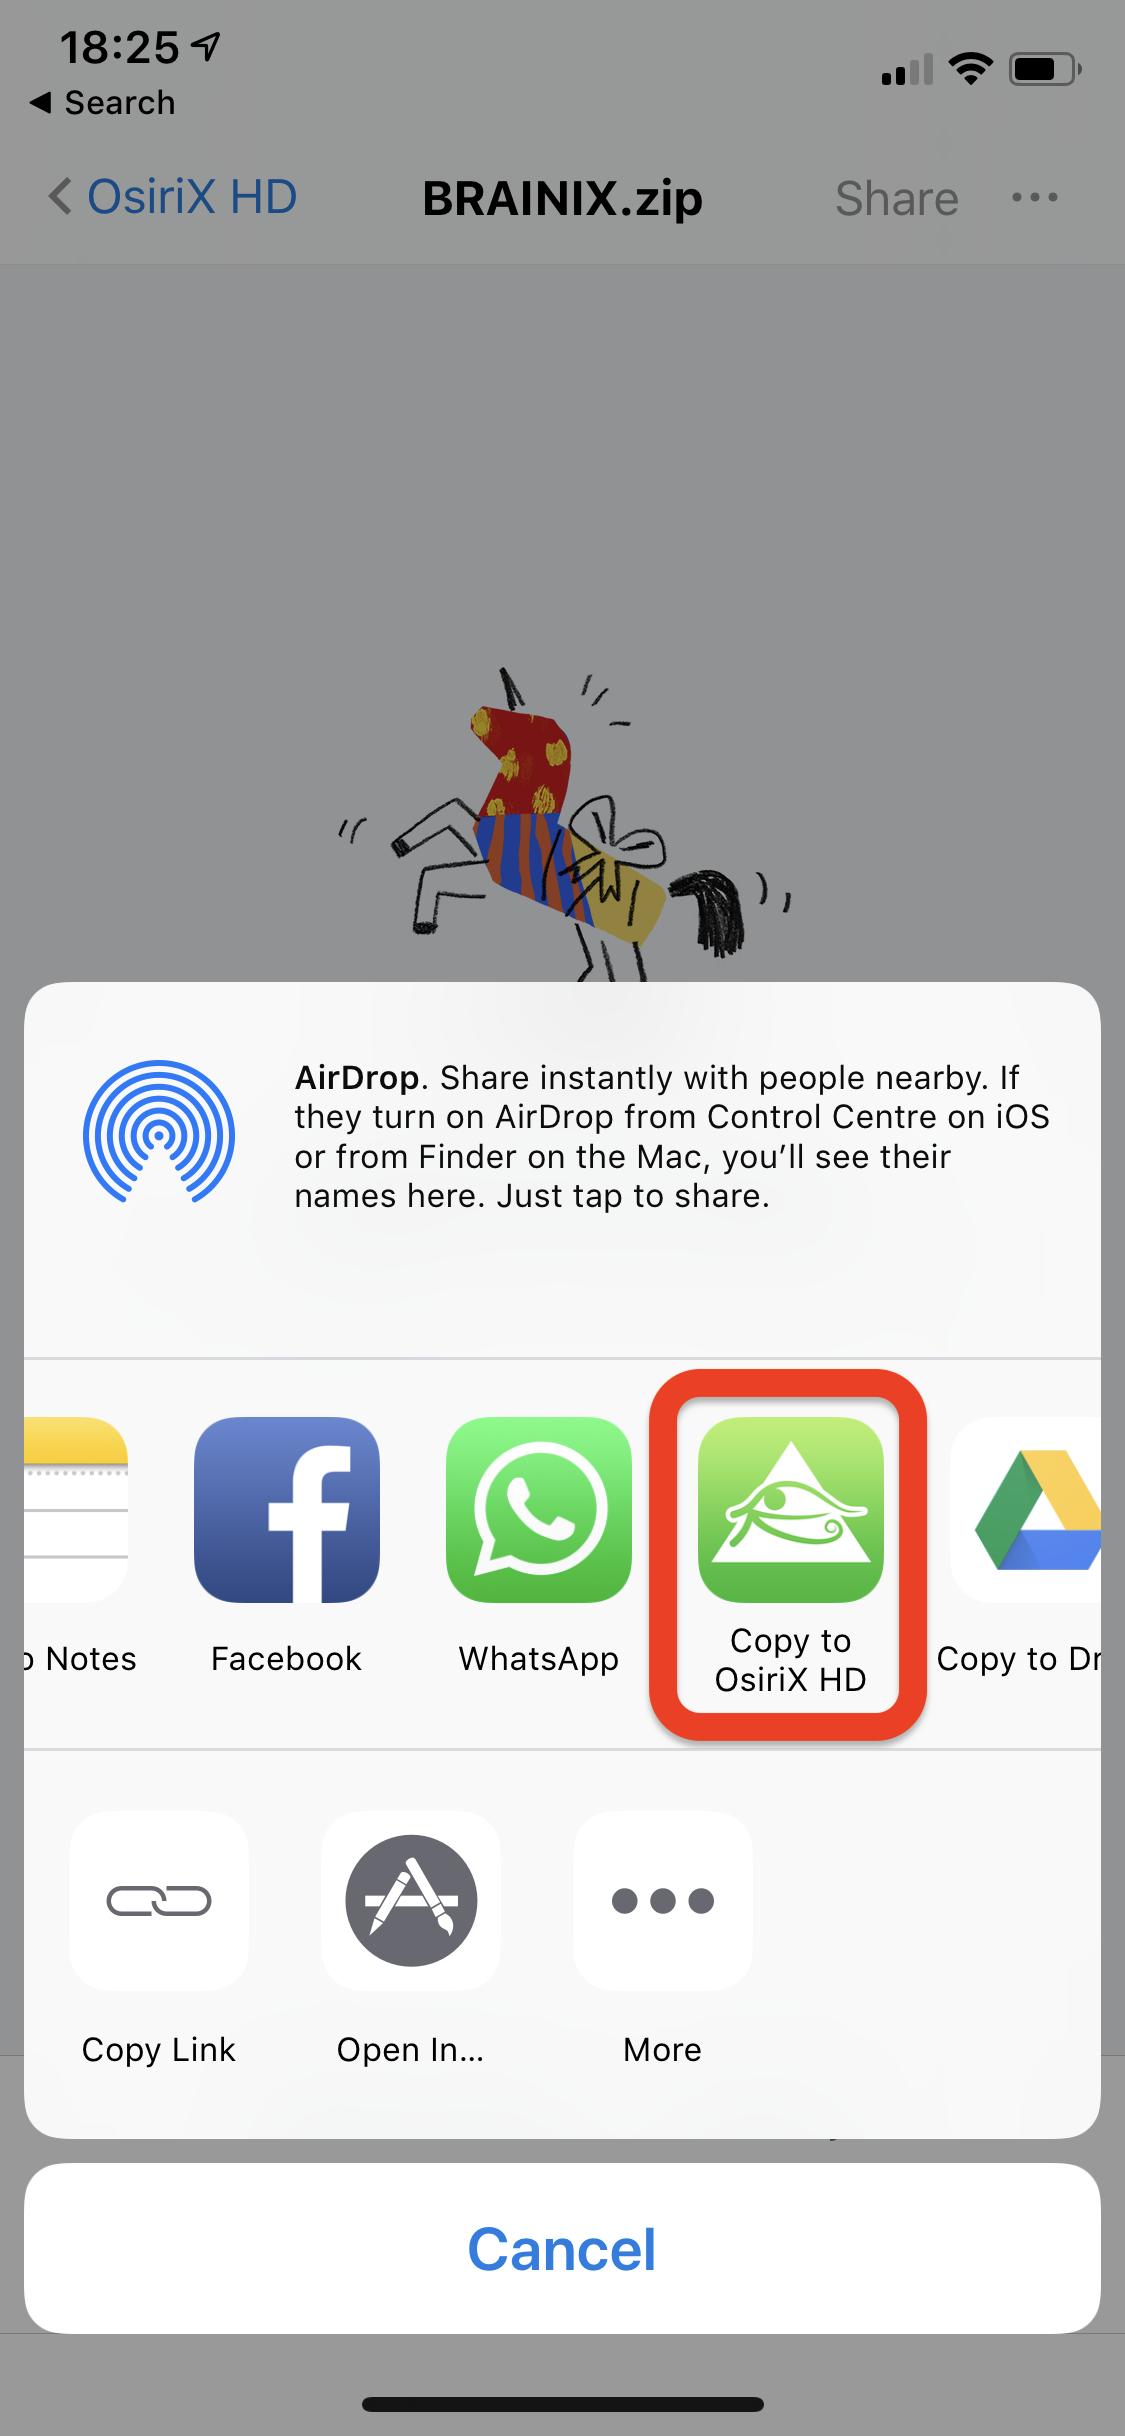
- Select the upper right menu.
- Choose "Export"
- Choose "Copy to OsiriX HD"
- OsiriX HD is launched, and after few seconds, the images will appear in the database.
To transfer images through your Google Drive account:
- Copy files (a folder containing DICOM files, compressed in a zip file) or a DICOM file, with the '.dcm' or 'zip' extension in your Google Drive account.
- Launch Google Drive on your iOS device
- Select the '...' menu.
- Select 'Open In'.
- Wait until the file is copied"
- Choose "Copy to OsiriX HD"
- OsiriX HD is launched, and after few seconds, the images will appear in the database.
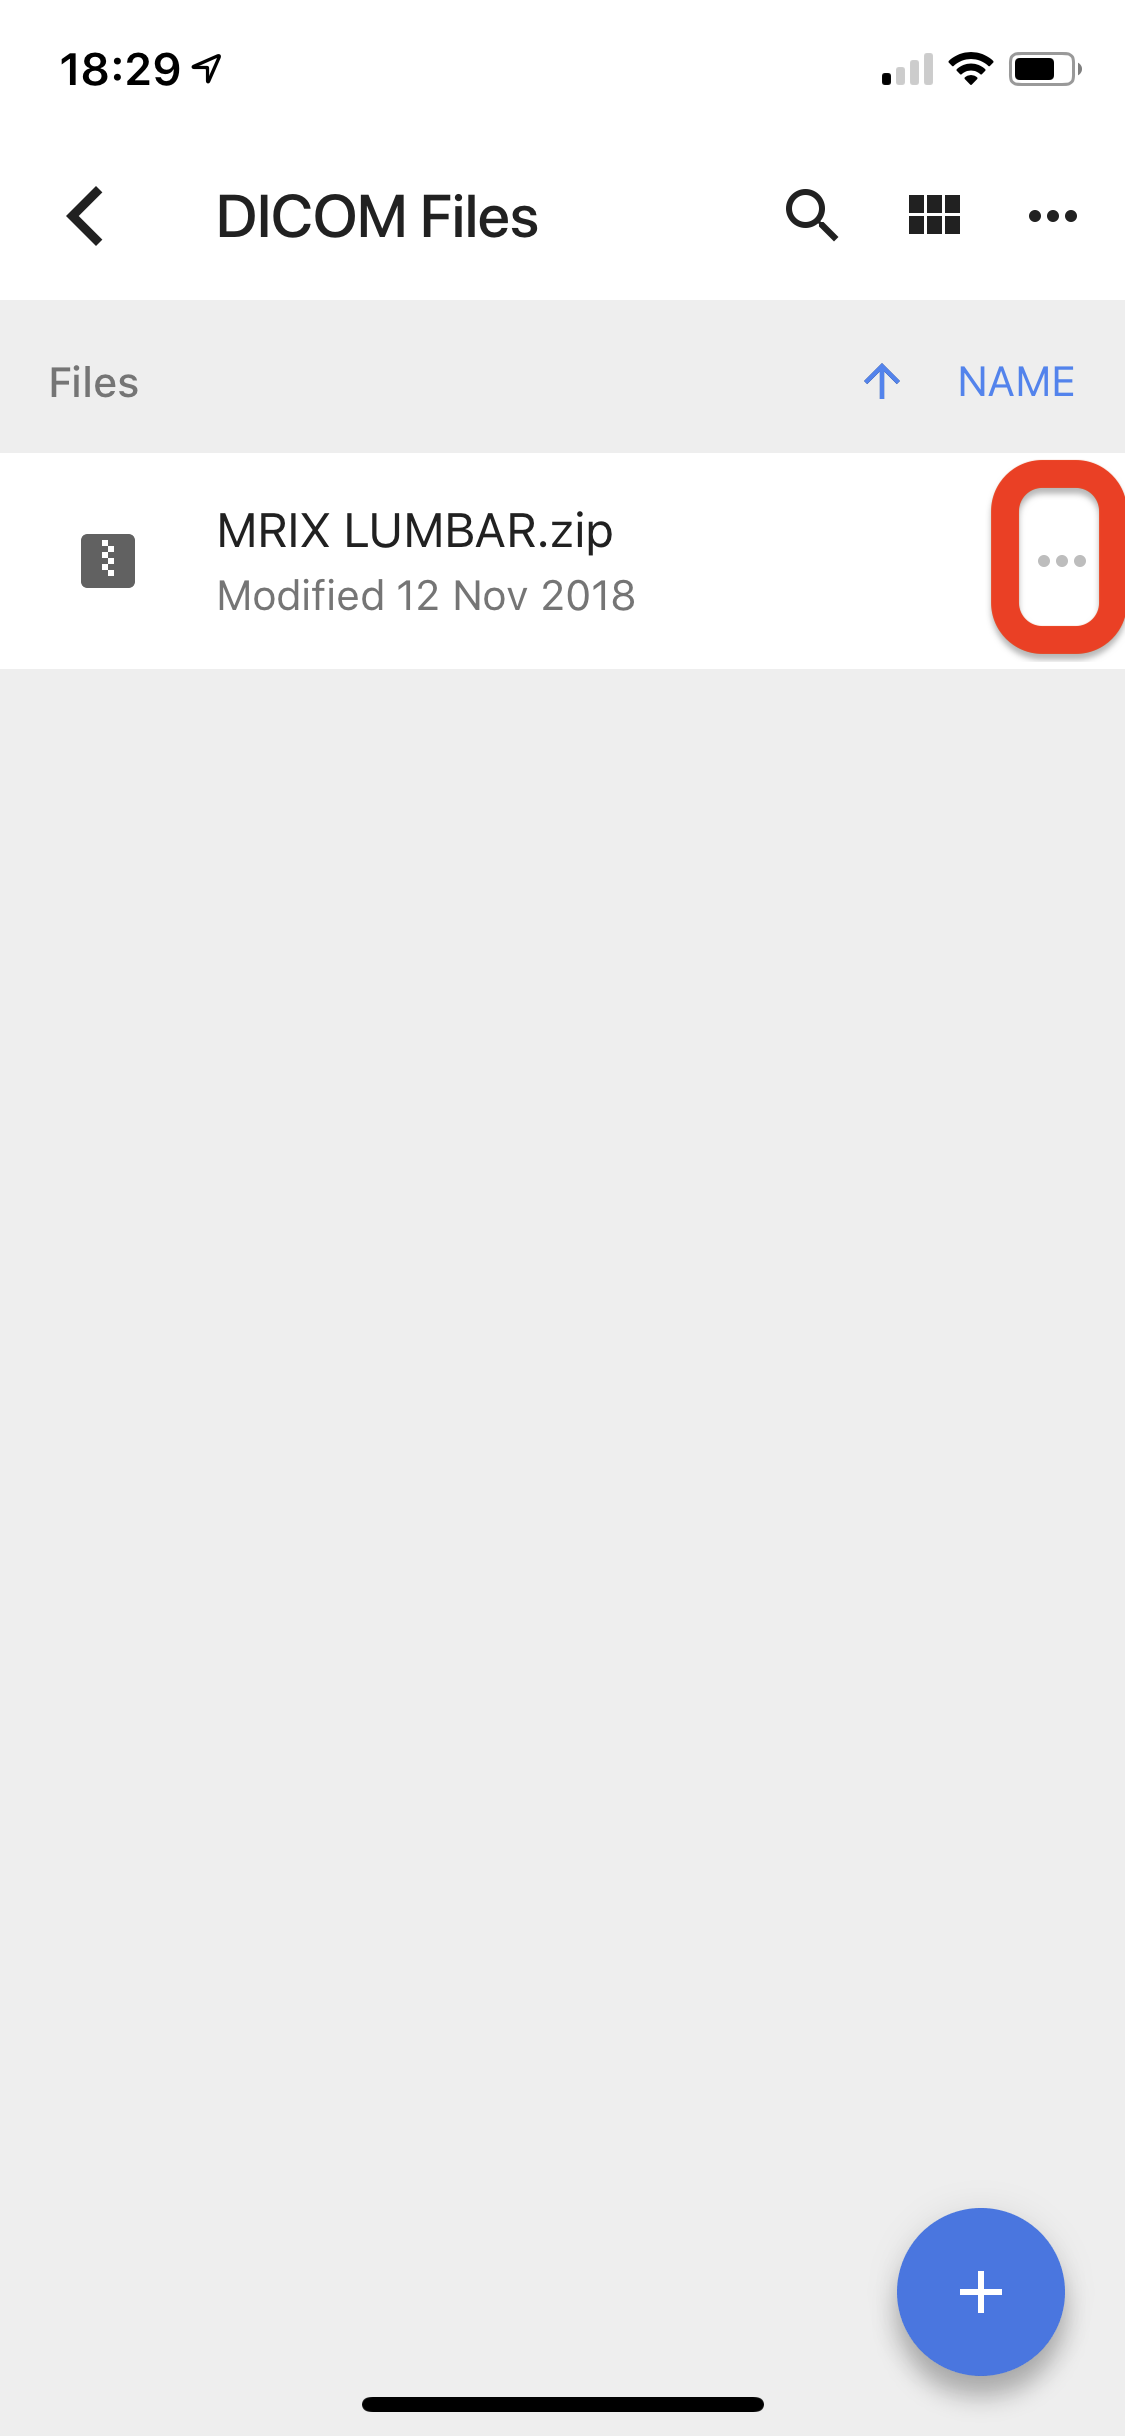
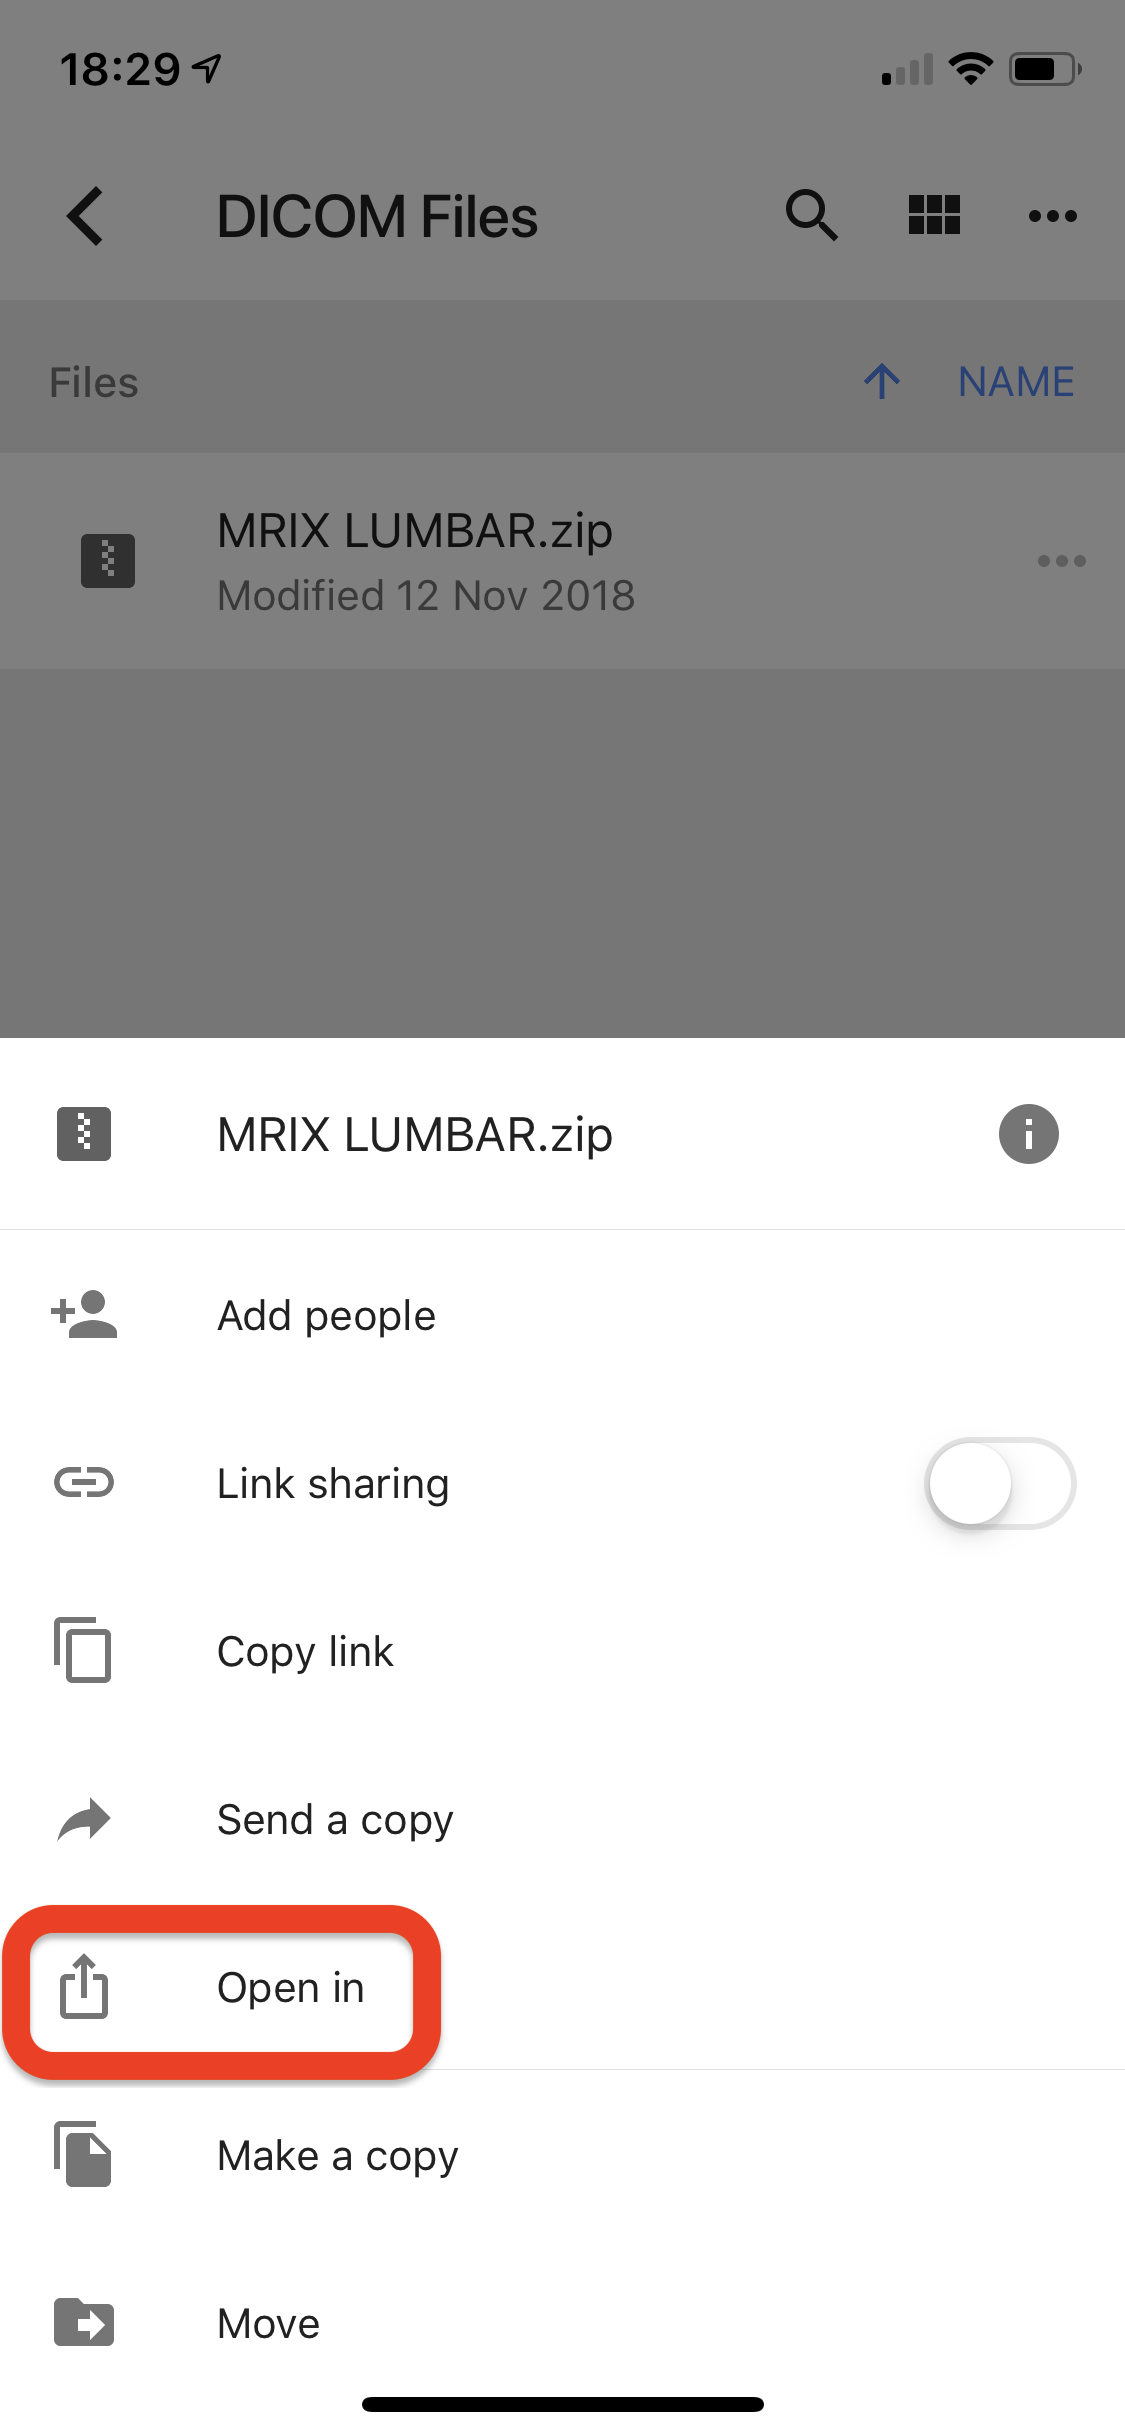


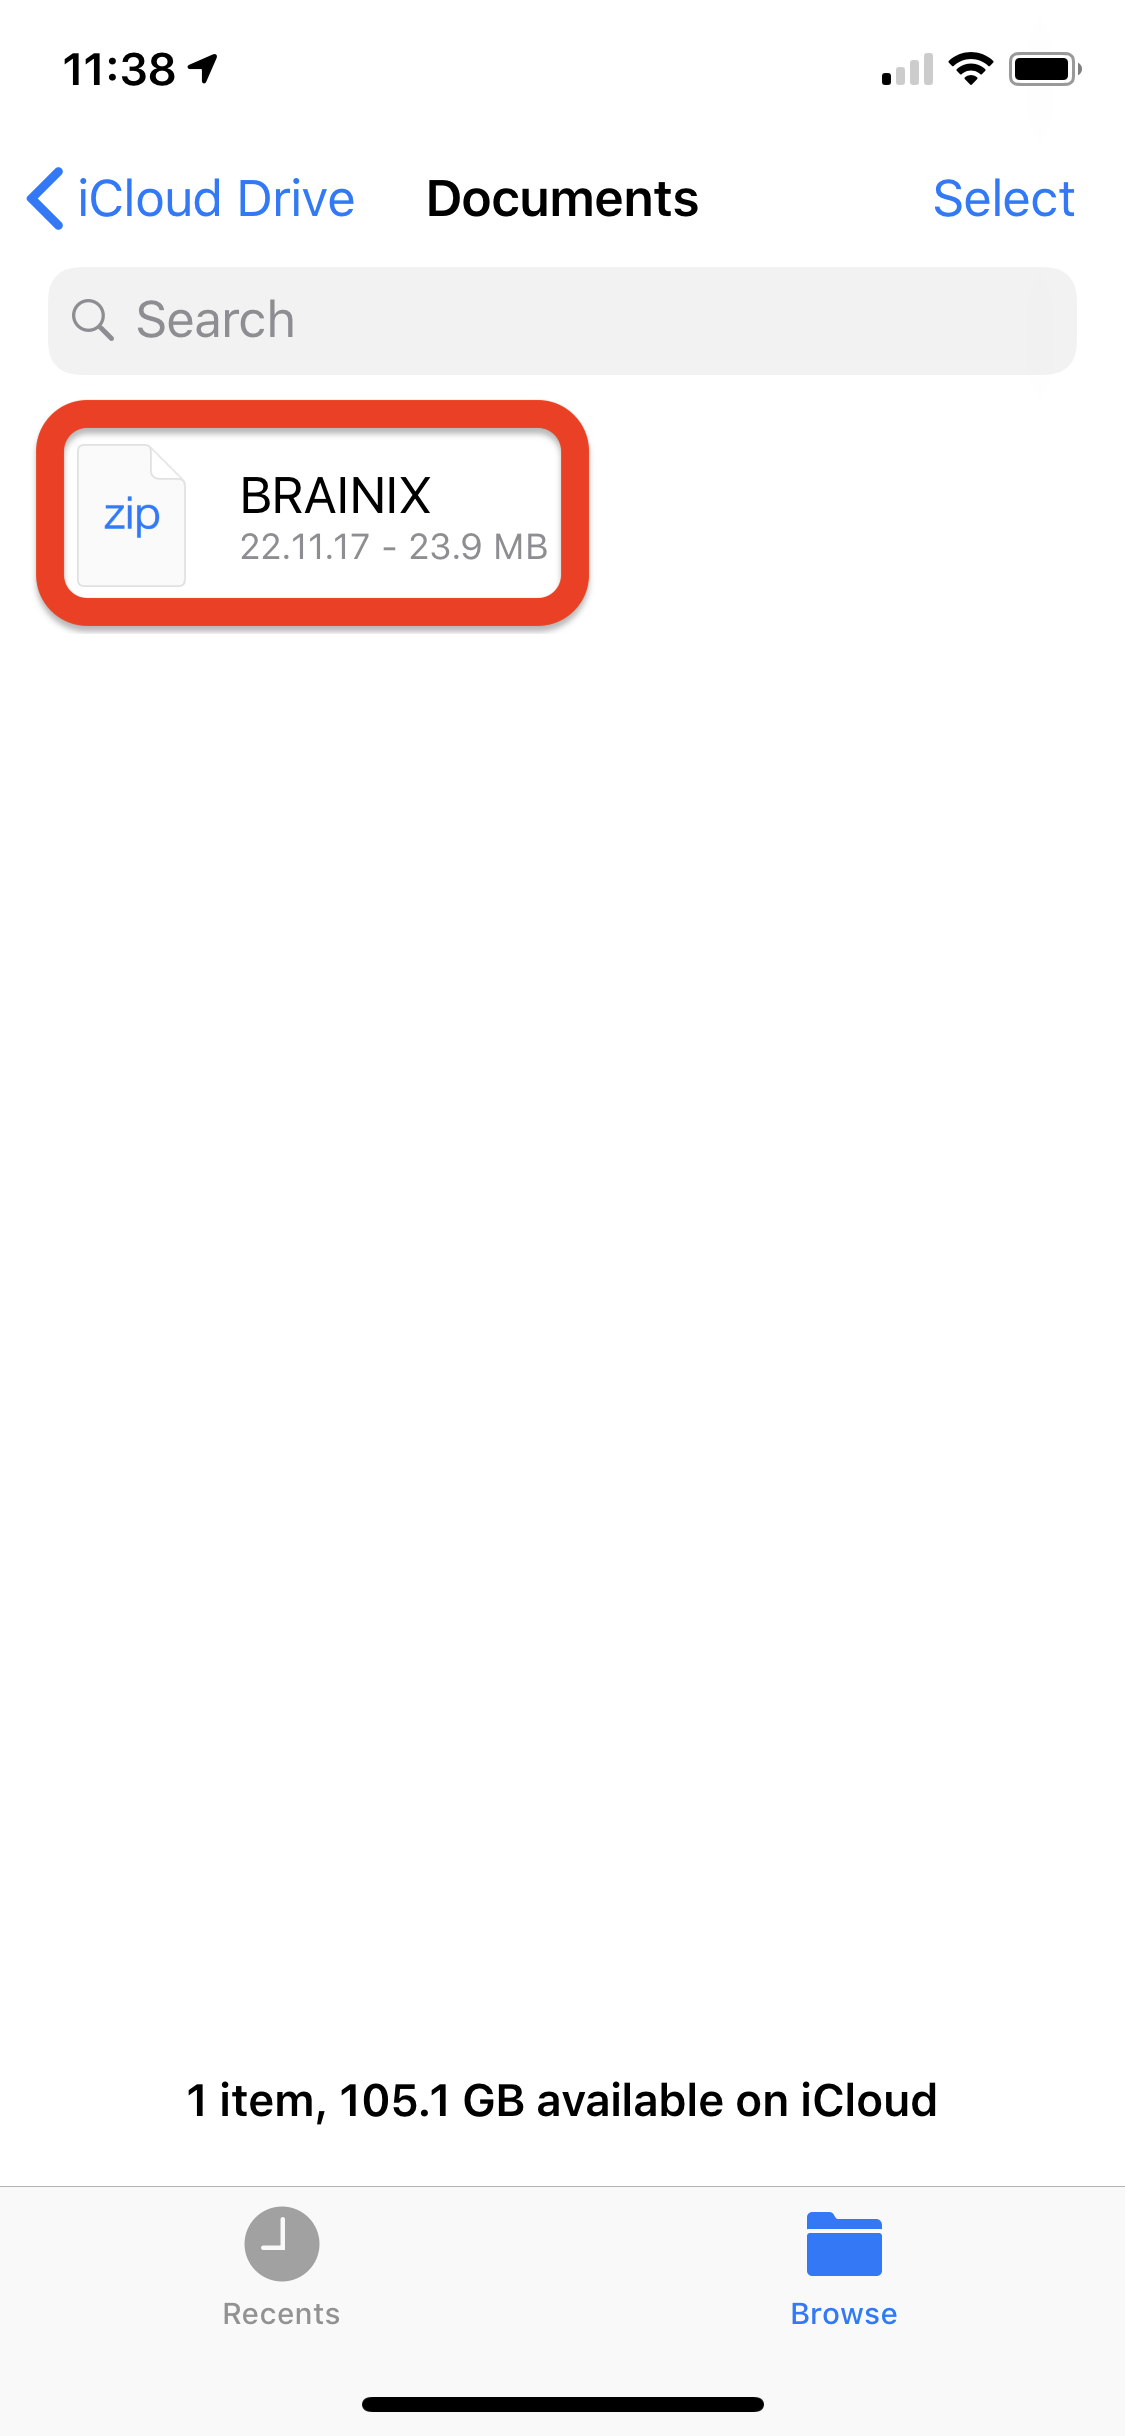
To transfer images through your iCloud / Files account:
- Copy files (a folder containing DICOM files, compressed in a zip file) or a DICOM file, with the '.dcm' or 'zip' extension in your iCloud / Files account.
- Launch Files on your iOS device
- Press on the file, and wait until the file is downloaded on your iOS device.
- Select the upper right icon.
- Choose "Copy to OsiriX HD"
- OsiriX HD is launched, and after few seconds, the images will appear in the database.
osirix:// URL scheme
In iOS, an application is able to “bind” itself to a custom URL scheme. Using that scheme you can launch this app from a web browser or from another application on the device.
This feature allows to integrate OsiriX HD to virtually any other iOS app or web site.
In current version three methods are supported through the osirix:// URL scheme:
- downloadURL: this function allows to ask to OsiriX HD to download a file from an URL.
Example: osirix://?methodName=downloadURL & URL='http://.../file.dcm'
There are three parameters:- methodName is 'downloadURL'. This field is mandatory.
- URL is the URL where to access the file. Currently only zip files or DICOM files are supported.
- Display is a boolean value, indicating if the study has to be selected and opened, after the download is complete. This parameter is optional.
- findObject: this function allows to display or delete any studies stored in the OsiriX HD database.
Example: osirix://?methodName=findObject &request=(name CONTAINS[cd] 'KNEE') &table=Study &execute=Open
There are four parameters:- methodName is 'findObject'. This field is mandatory.
- request is a SQL query string. See XML-RPC documentation and database tables (used in Albums filters) of OsiriX for Mac for more information.
- table is the table on which the SQL query string is applied. There are three levels: 'Study', 'Series' or 'Image'
- execute is the order to apply to the result. There are two options: 'Open' or 'Delete'.
- retrieve: this function allows to send a Q&R order to a DICOM node to retrieve and display a study.
Example: osirix://?methodName=retrieve &serverName=Minipacs &filterKey=PatientID &filterValue=296228
There are four parameters:- methodName is 'retrieve'. This field is mandatory.
- serverName is the exact name of a DICOM node, as displayed in the "Q&R" tab of OsiriX HD.
- filterKey is the DICOM field name for the Query (C-FIND SCU). Multiples fields are supported: PatientsName, ReferringPhysiciansName, InstitutionName, Comments, AccessionNumber, PatientID, StudyDescription, PatientBirthDate, StudyInstanceUID and StudyID.
- filterValue is the value associated to the filterKey field. You can use DICOM wildcards, such as * or ?.
This feature allows to use OsiriX HD as a complementary viewing program to any EMR, RIS, HIS, ...
Settings
The settings of OsiriX HD can be found in the "Settings" application of your iOS device.
It contains the following options:
- Listener AETitle & Port. This is where you can change these information. These are capital settings if you want to receive images from a DICOM Workstation.
- Listener Preferred Syntax. Because network performances are limited on iOS devices, OsiriX HD supports compressed syntaxes such as JPEG or JPEG2000, lossless or lossy. It is highly recommended to use JPEG2000 syntax (faster, better, smaller)
- Listener Timeout. This value is the number of seconds that OsiriX HD will wait before giving up when a communication stops, fails or blocks.
- Listener Encoding.
- Bonjour publishing (On/Off). Allows the device to automatically appear in OsiriX on the Mac.
- DICOM Overlays. Display DICOM overlays, if available, on the images.
- SUV Conversion. Allows to automatically convert PET images to SUV values, based on the specified DICOM field for the 'Acquisition' time.
- Image Sorting. Choose how the images are sorted in a series: by Instance Number, by Slice Location or by Acquisition Time.
- Series Sorting. Choose how the series are sorted in a study: by Series Number or by Acquisition Time.
- Invert PET and NM images. Allows you to automatically see PET and Nuclear Medicine images as white on black, instead of black on white.
- JPEG Color Space. For Color JPEG DICOMs, use JPEG photometric value, instead of DICOM photometric value.
- ROI color. Allows you to choose the colors of the measurements.
- Enable Cine Loop (On/Off).
- Max number of Studies. Choose the maximum amount of studies to be stored in the database before deletion.
- Oldest Study. Choose the maximum amount of time a study should be stored in the database before deletion.
- iCloud. If you activate this feature, your entire database will be saved on iCloud, including all DICOM images.
JPEG2000 / JPEG-LS
JPEG2000 and JPEG-LS compression protocol is supported on all 'retrieve' modes: C-MOVE, C-GET, WADO and DICOMweb. It greatly increases network performances.
If you use OsiriX for Mac: for JPEG2000 / JPEG-LS with C-GET, don't forget to activate in OsiriX for Mac: Preferences Listener: Preferred Syntax: JPEG2000 or JPEG-LS Lossless and Lossy, instead of Explicit Little Endian.
For the WADO protocol, the default stored syntax (original syntax) will be used. That means these files need to be stored as JPEG2000 or JPEG-LS on the server, to be retrieved as compressed files.
For C-MOVE, the defined syntax in OsiriX HD listener will be used (by default JPEG2000): see Settings.
Security
If you transfer and store non-anonymized DICOM files to your iOS device, you have to care about security!
There are a few small settings that can transform your iOS device in a safe storage media:
- In OsiriX HD Settings -> Turn off iCloud sync, to avoid storing DICOM images on your iCloud account.
- In iOS Settings -> General, activate Passcode Lock.
- In iOS Settings -> General, activate Auto-Lock with the Erase Data function on.
- In iOS Settings -> Mail, Contacts, Calendars, activate the iCloud 'Find My iPhone'. This will allow you to remotely wipe your iPhone, if you lost it.
- If you receive or exchange DICOM files with Dropbox, emails, ..., use password protected ZIP files: OsiriX HD supports these protected files.
Bug Report
If you experience crashes with OsiriX HD on your iOS device, you can help us solve those issues by sending us your crash reports.
These crash reports are stored on your iOS device at the time of the crash. When you sync your device with iTunes, the reports are copied to your computer to the following folder:
- If you are using a Mac: ~/Library
/Logs/CrashReporter /MobileDevice/ <DEVICE NAME> - If you are running Windows XP: C:\Documents and Settings\<USERNAME>\Application Data\Apple computer\Logs
\CrashReporter\<DEVICE NAME> - If you are running Windows Vista: C:\Users\[USERNAME]\AppData
\Roaming\Apple computer\Logs \CrashReporter \MobileDevice\<DEVICE NAME>
The files will start with the name of the application and contain a date stamp. All crash reports starting with "OsiriX HD..." might be helpful for us.
Please send your crash reports to iphone@pixmeo.com
More
If you can't find the answer to a question in this Manual, please e-mail us at: